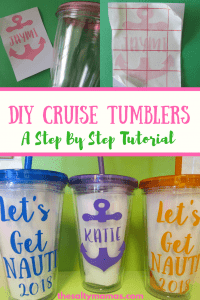
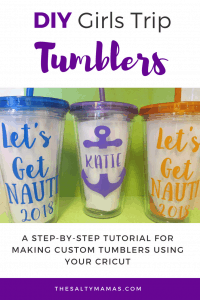
We are gearing up BIG TIME for an upcoming cruise with our MomSquad, and we are so excited we are pretty much beside ourselves. And thus, we are buying alllll the things. We like to go all out with our Girls’ Trip Swag- we’ve got matching pajamas, we’ve got matching shirts– and we’ve got matching cruise tumblers, handmade by yours truly. If you’ve ever been on a cruise, you might know that bringing your own tumbler is kind of crucial, both for bringing your complimentary water and lemonade with you wherever you go, as well as making your adult beverages easier to drink in the hot tub. And honestly? It’s just more fun when you match your girlfriends.
So if you’ve got a Bachelorette Party, or a Girls’ Trip, or a Moms’ Weekend Away coming up, snag your cups here and then ask your ladies which color they want to claim. Then pick your path- the Time Saver or the Creative Cricut Type– and you’ll be sipping pretty in no time.
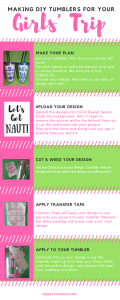
Are You the Time Saver?
Save yourself some time and trouble, and let The Salty Mamas make the vinyls for you. They’ll come cut, weeded, and with transfer tape applied, so all you’ll need to do is peel and stick onto the tumblers of your choice (we really love this rainbow collection from Amazon). You can purchase your vinyls at our Etsy Shop-and we gotta say, they’re very reasonably priced compared to what you usually find on Etsy.
Are You the Creative Cricut Type?
First Up…
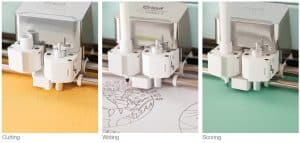
You’ll need a Cricut machine, a cutting mat, and some vinyl.
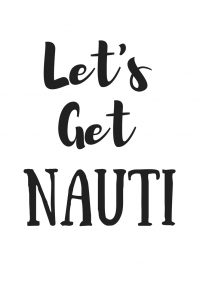
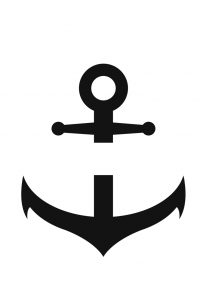
Next, save the images below (or create your own at canva.com).
Open Up Cricut Design Studio
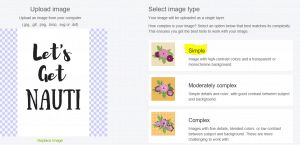
Start a new project and click on “Upload Image.” Upload the files above, one at a time, and choose “Simple Image.”
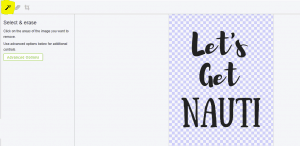
Erase the Background
Use the eraser tool to erase the white background, both around the letters and in the letter cut-outs themselves.
Save the Image as a Cut File
This step is crucial! You can choose to save the image as a printable, or cut file. Choose cut file (the one on the right).

Insert into Your Project
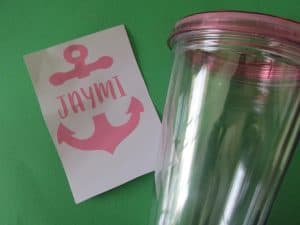
Insert the images, one at a time again. Size “Let’s Get Nauti” to about two and a half inches wide, and about four inches tall. Size the Anchor to three inches wide by four inches tall.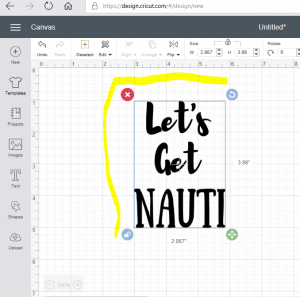
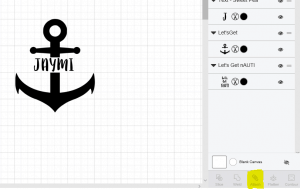
Add In Names
Using the font of your choice, type out the name you want on each cup. (For this design, we like Sweet Pea, which you can download here for personal use, or Copperplate Gothic Bold, which is a typical font on most systems). Insert it into the Anchor with a simple drag-and-drop to make sure it fits. We like to attach the images by selecting both and clicking “attach,” which makes it easier to move to the transfer tape.
Cut Your Image
Now it’s time to cut! Choose your vinyl, attach it to your mat, and let your Cricut do the work.
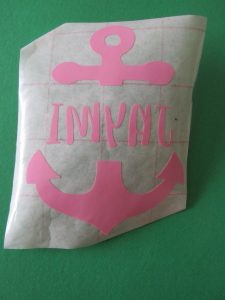
Weed the Design
Grab a glass of wine, a trashy show, and weed that vinyl. Don’t forget to remove the pieces inside the letters!
Apply Transfer Tape to the Design
Please- do yourself a favor- and get yourself some transfer tape (and honestly- we like this brand soooo much better than the Cricut brand. Just the right amount of sticky). It makes this whole process SO much easier.
Cut a piece of transfer tape roughly the size of the image. Remove the paper backing and press the tape over the entire vinyl design.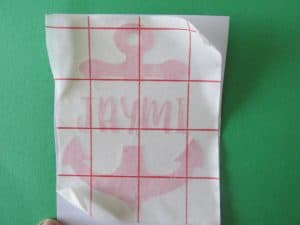
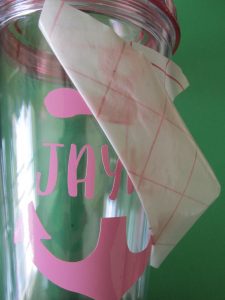
Remove the Vinyl’s Paper Backing.
Your image should now be stuck to the transfer tape.
Apply to the Tumbler
Carefully line up the transfer tape with your cruise tumbler. When you’re sure it’s even, place it on the cup. Press over the entire design with a finger nail or a coin- anything to make sure it’s good and stuck before removing the tape.
 23
23
Your Cruise Tumblers Are Done!
Remove the transfer tape, and your design will be on your tumbler. Repeat with the design on the other side, and you’re done! Enjoy your cruise tumblers- and your girls’ trip!- in style, Mamas!

I have a cricut, but haven’t ventured into drinkware yet… Is it dishwasher safe?
The answer really depends on your dishwasher and vinyl. I throw my custom-vinyl mugs and tumblers into my dishwasher every day, and they hold up really well. One run through Christine’s dishwasher can decimate them. I’d start with something small and test it out before you try to put in a design you really care about.
If I have any cruises coming up, I’ll be going to the Etsy shop lol. One thing I haven’t ventured into is cricut stuff. But I got a bedazzler so I’m good with T-shirts… ?