
We are getting into the Christmas with toddlers BIG TIME over here. My kids are all about Christmas, all the time. From the Elf on the Shelf to writing (and rewriting. And rewriting) letters to Santa, they’ve got the holidays on the brain in a big way.
It’s extended all the way into our art time as well. I can’t bust out a pot of green paint without them painting a Christmas tree, or the playdough without it becoming a present or ornament or cookie for Santa.
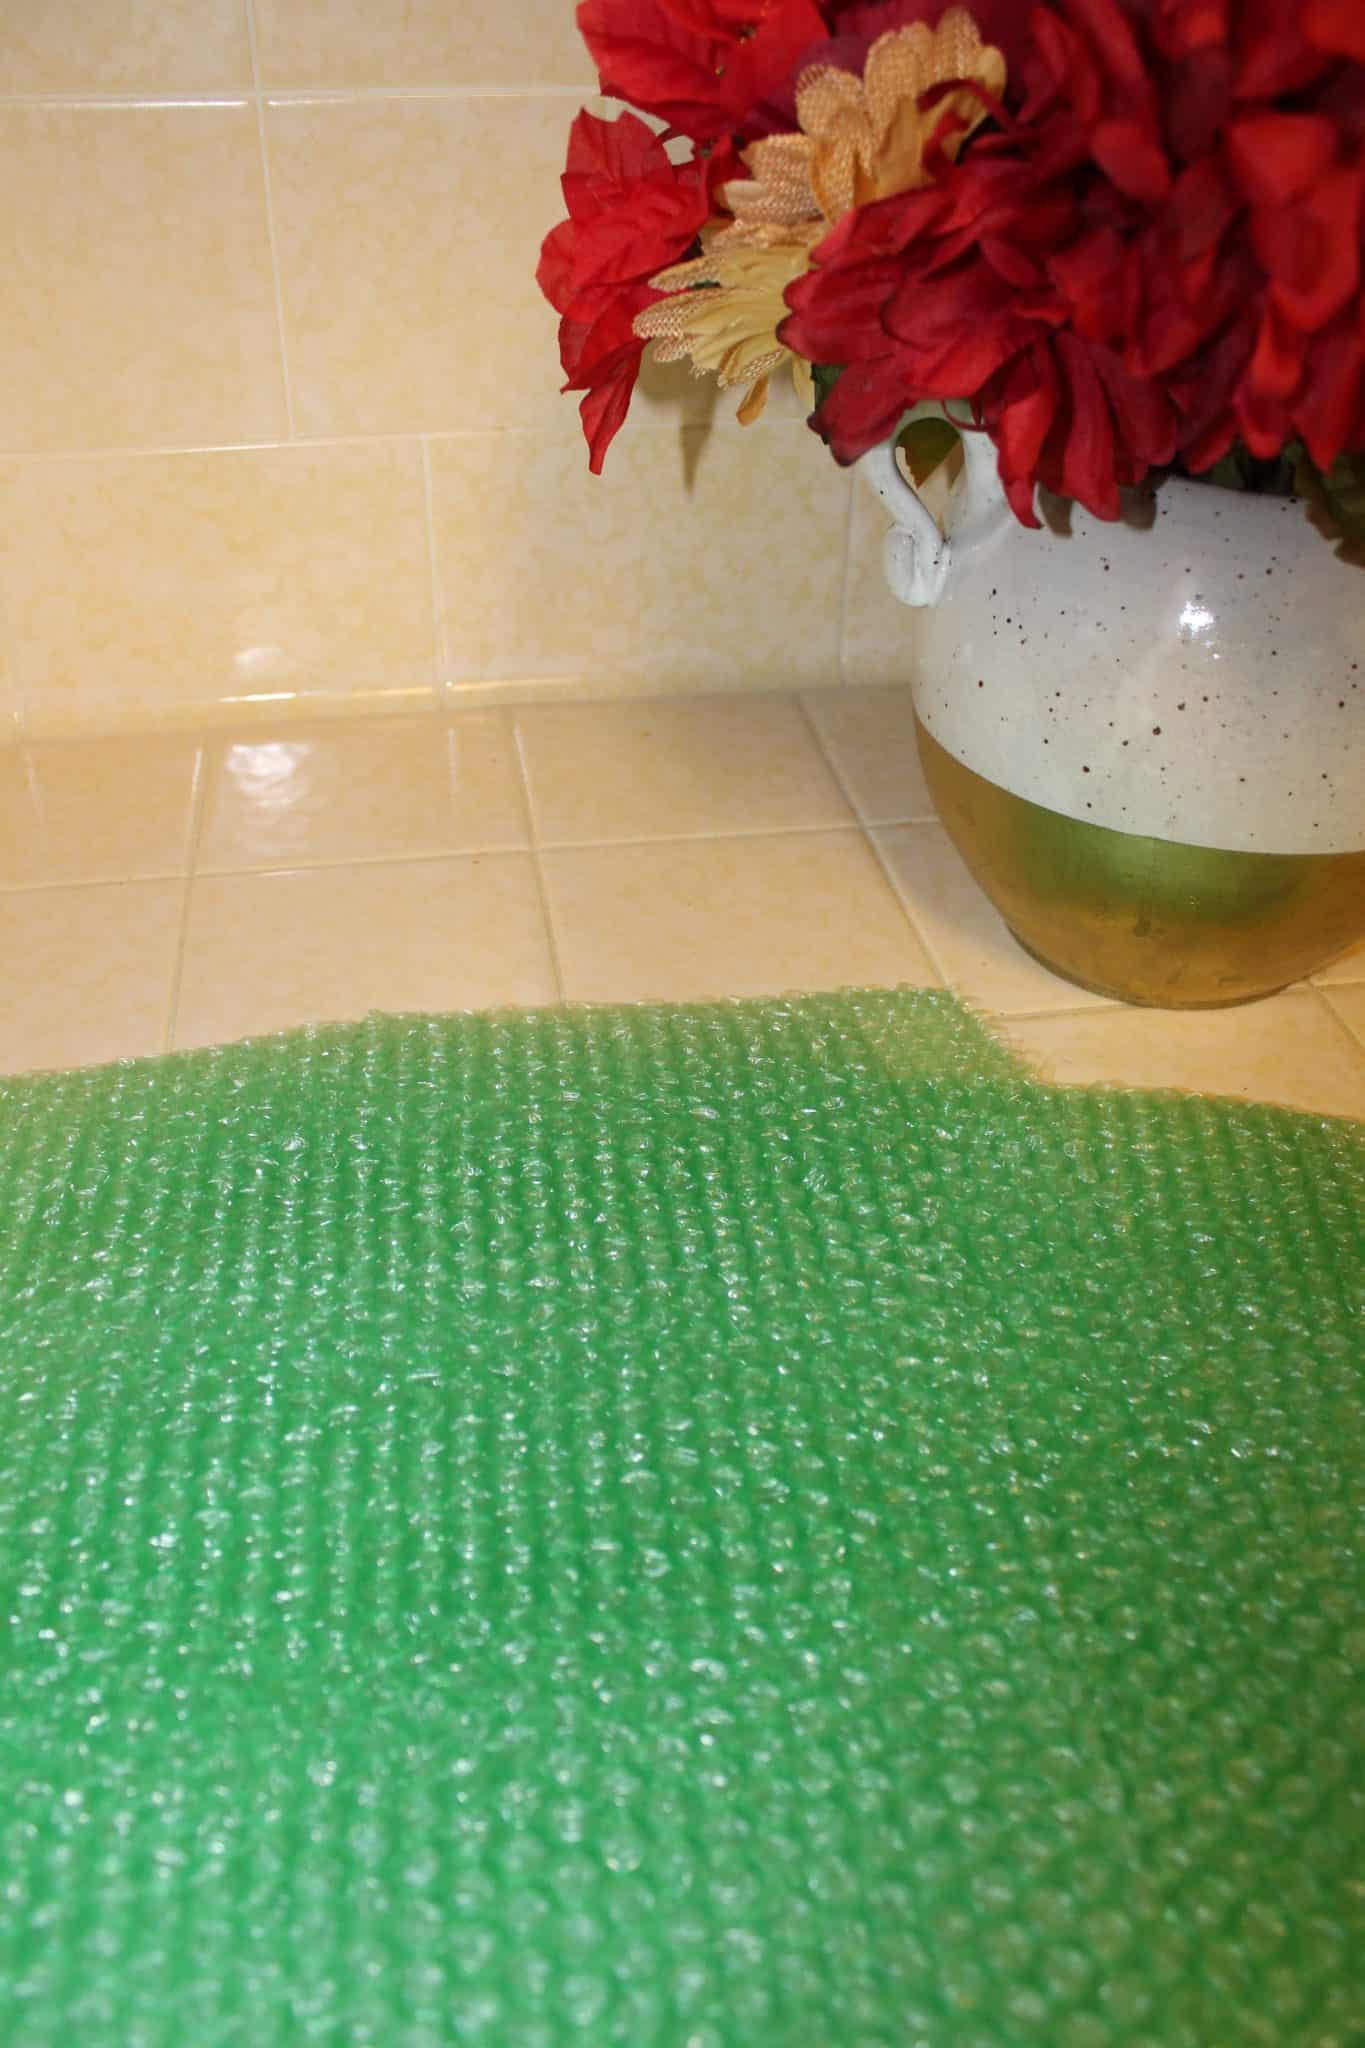
So when I opened one of my (THOUSAND) Amazon packages from my Black Friday shopping and saw that it included this green bubble wrap, I knew just what to do with it- turn it into a process based Christmas art project for toddlers (which just so happens to include an ADORABLE product for you, too).
If you’re kids are as into the holidays as ours are, we know they’ll love this Christmas tree print-making activity using bubble wrap. Read on for the instructions on how to make it happen!
This post contains affiliate links. You can read more at our legal page. Thanks for supporting The Salty Mamas!
Materials for Your Christmas Art for Toddlers
As always, the Salty Mamas try to keep our art as process based as possible- and this extends into our Christmas art for toddlers, too. We did take a few liberties with this one to get a cuter product, but feel free to let them experiment with the materials on their own, too.
This materials for this one couldn’t be simpler. You’ll need:
- Bubble Wrap
- Scissors
- Permanent Marker
- Tape
- Red and Green Paint
- Plain White Paper (printer paper works fine!)
- Painting Mat
- Clean Surface for Christmas Tree Print Making
Setting Up Your Christmas Tree Print Making
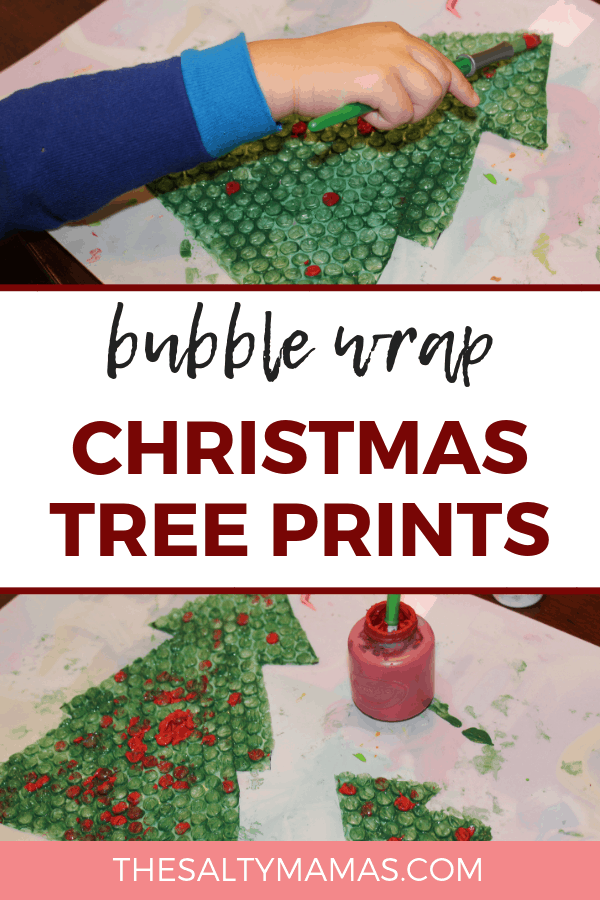
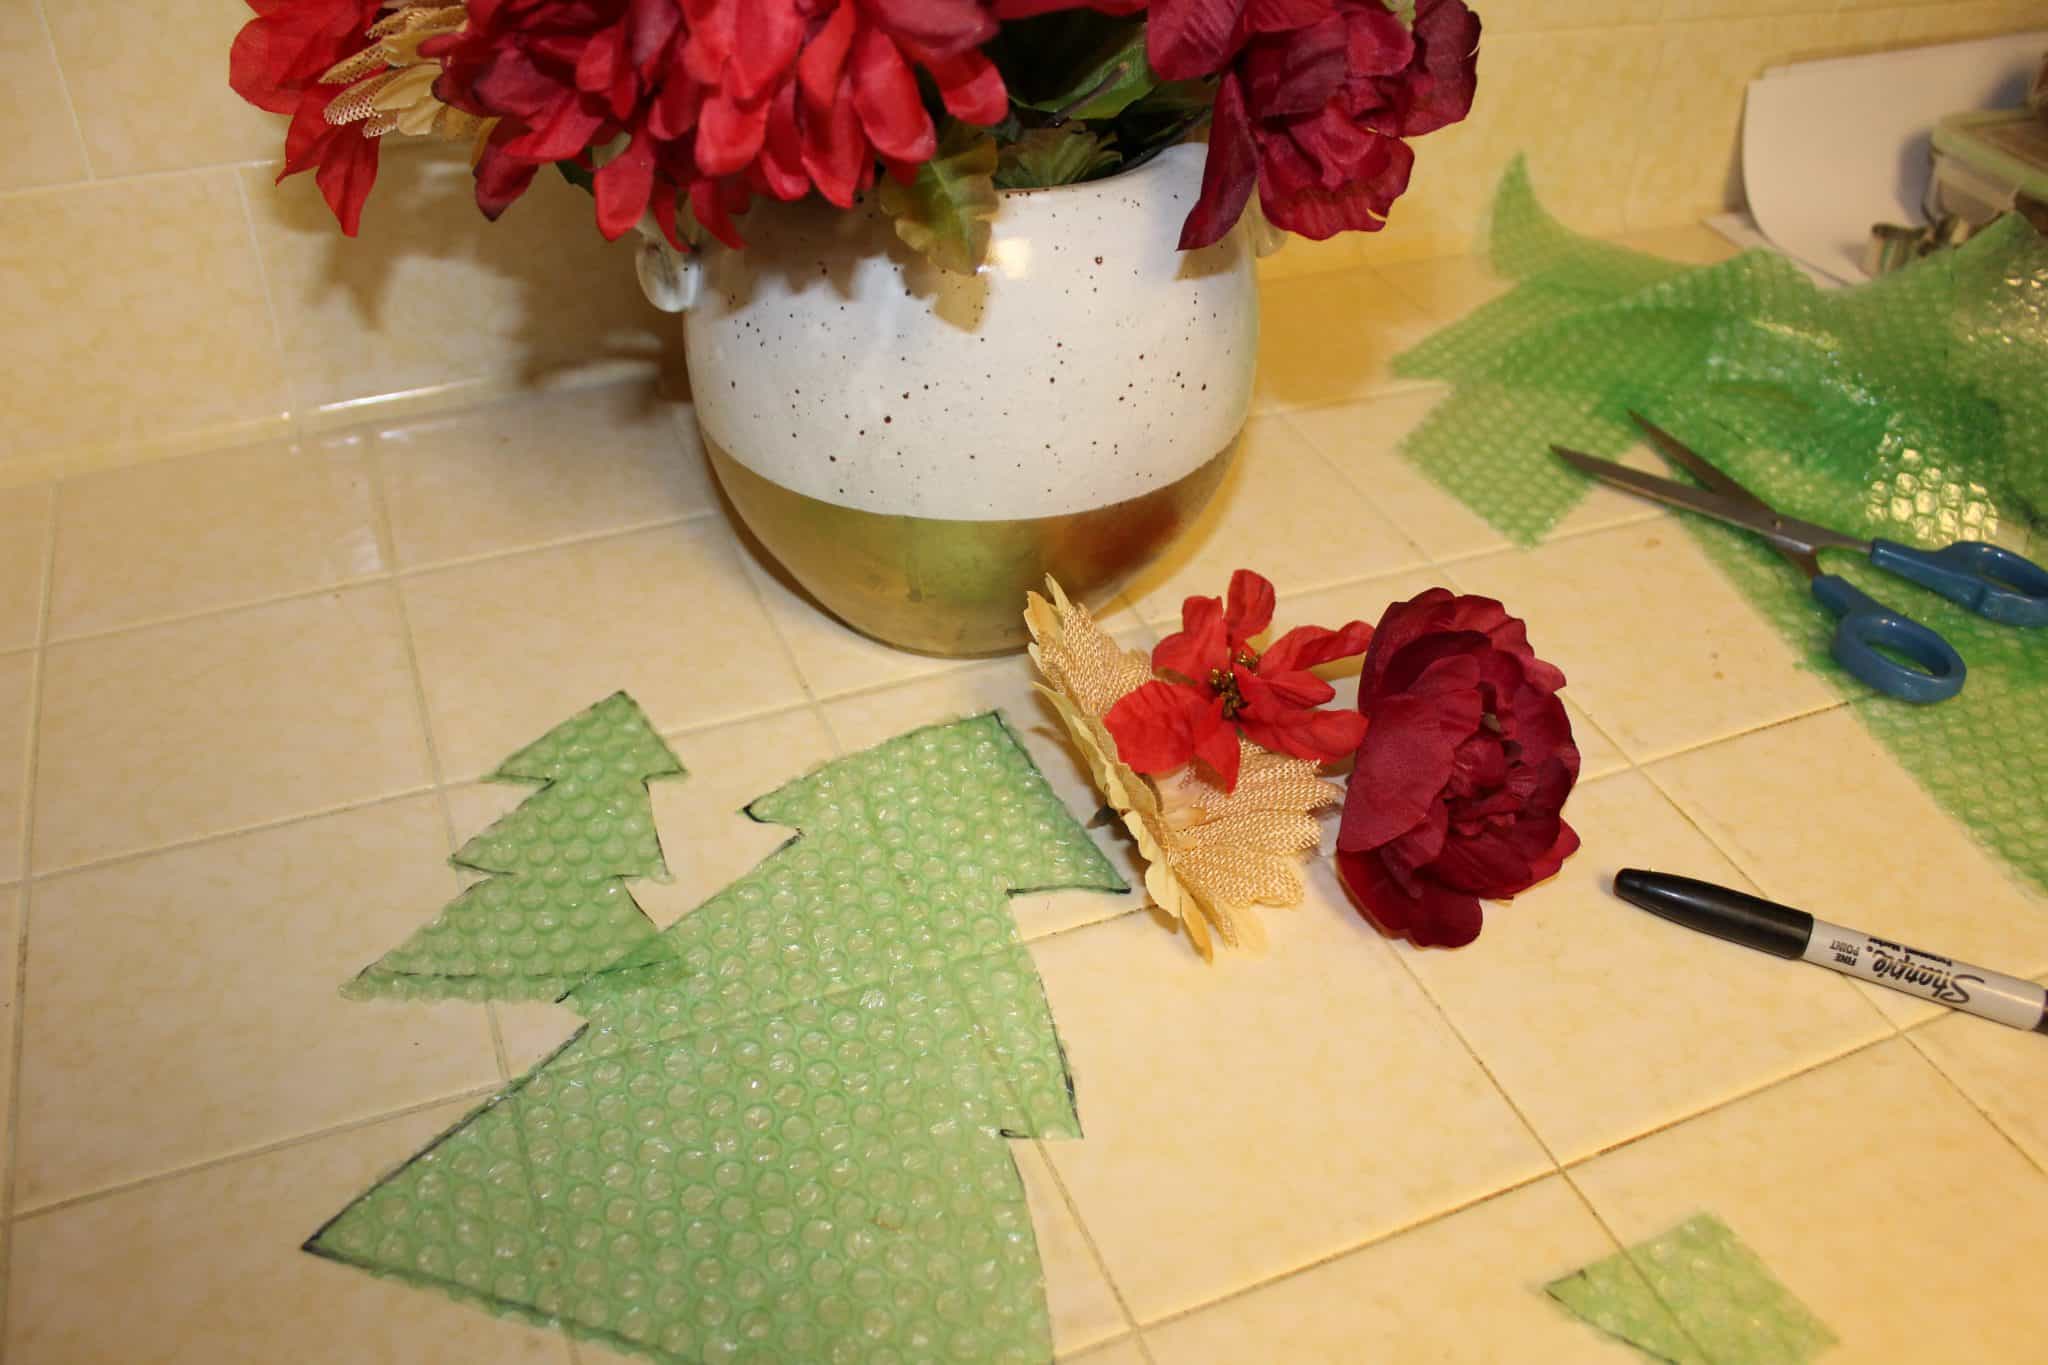
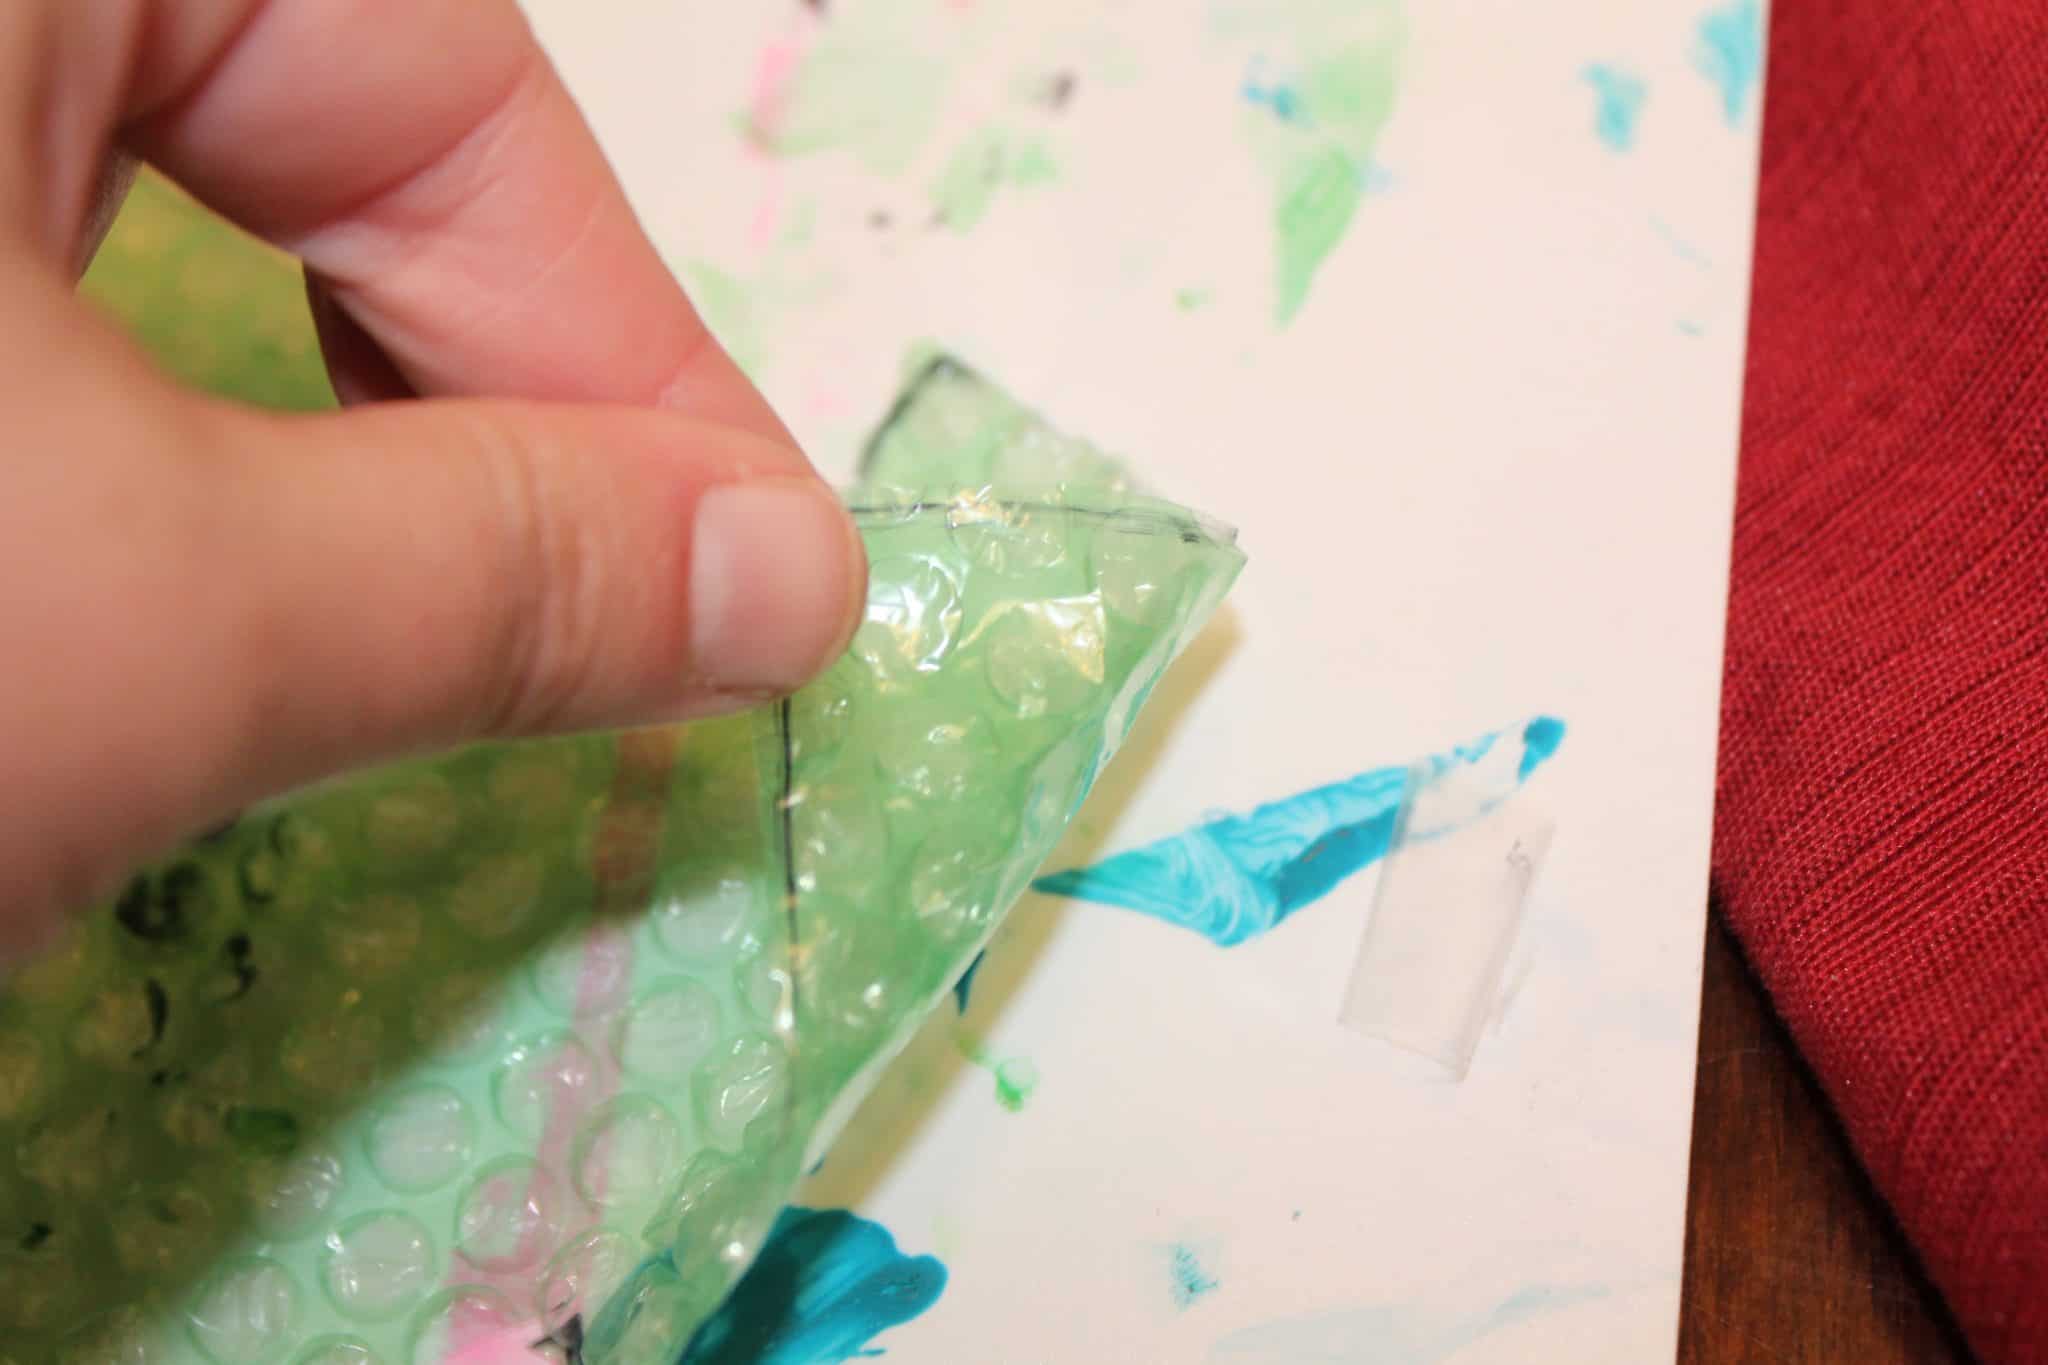
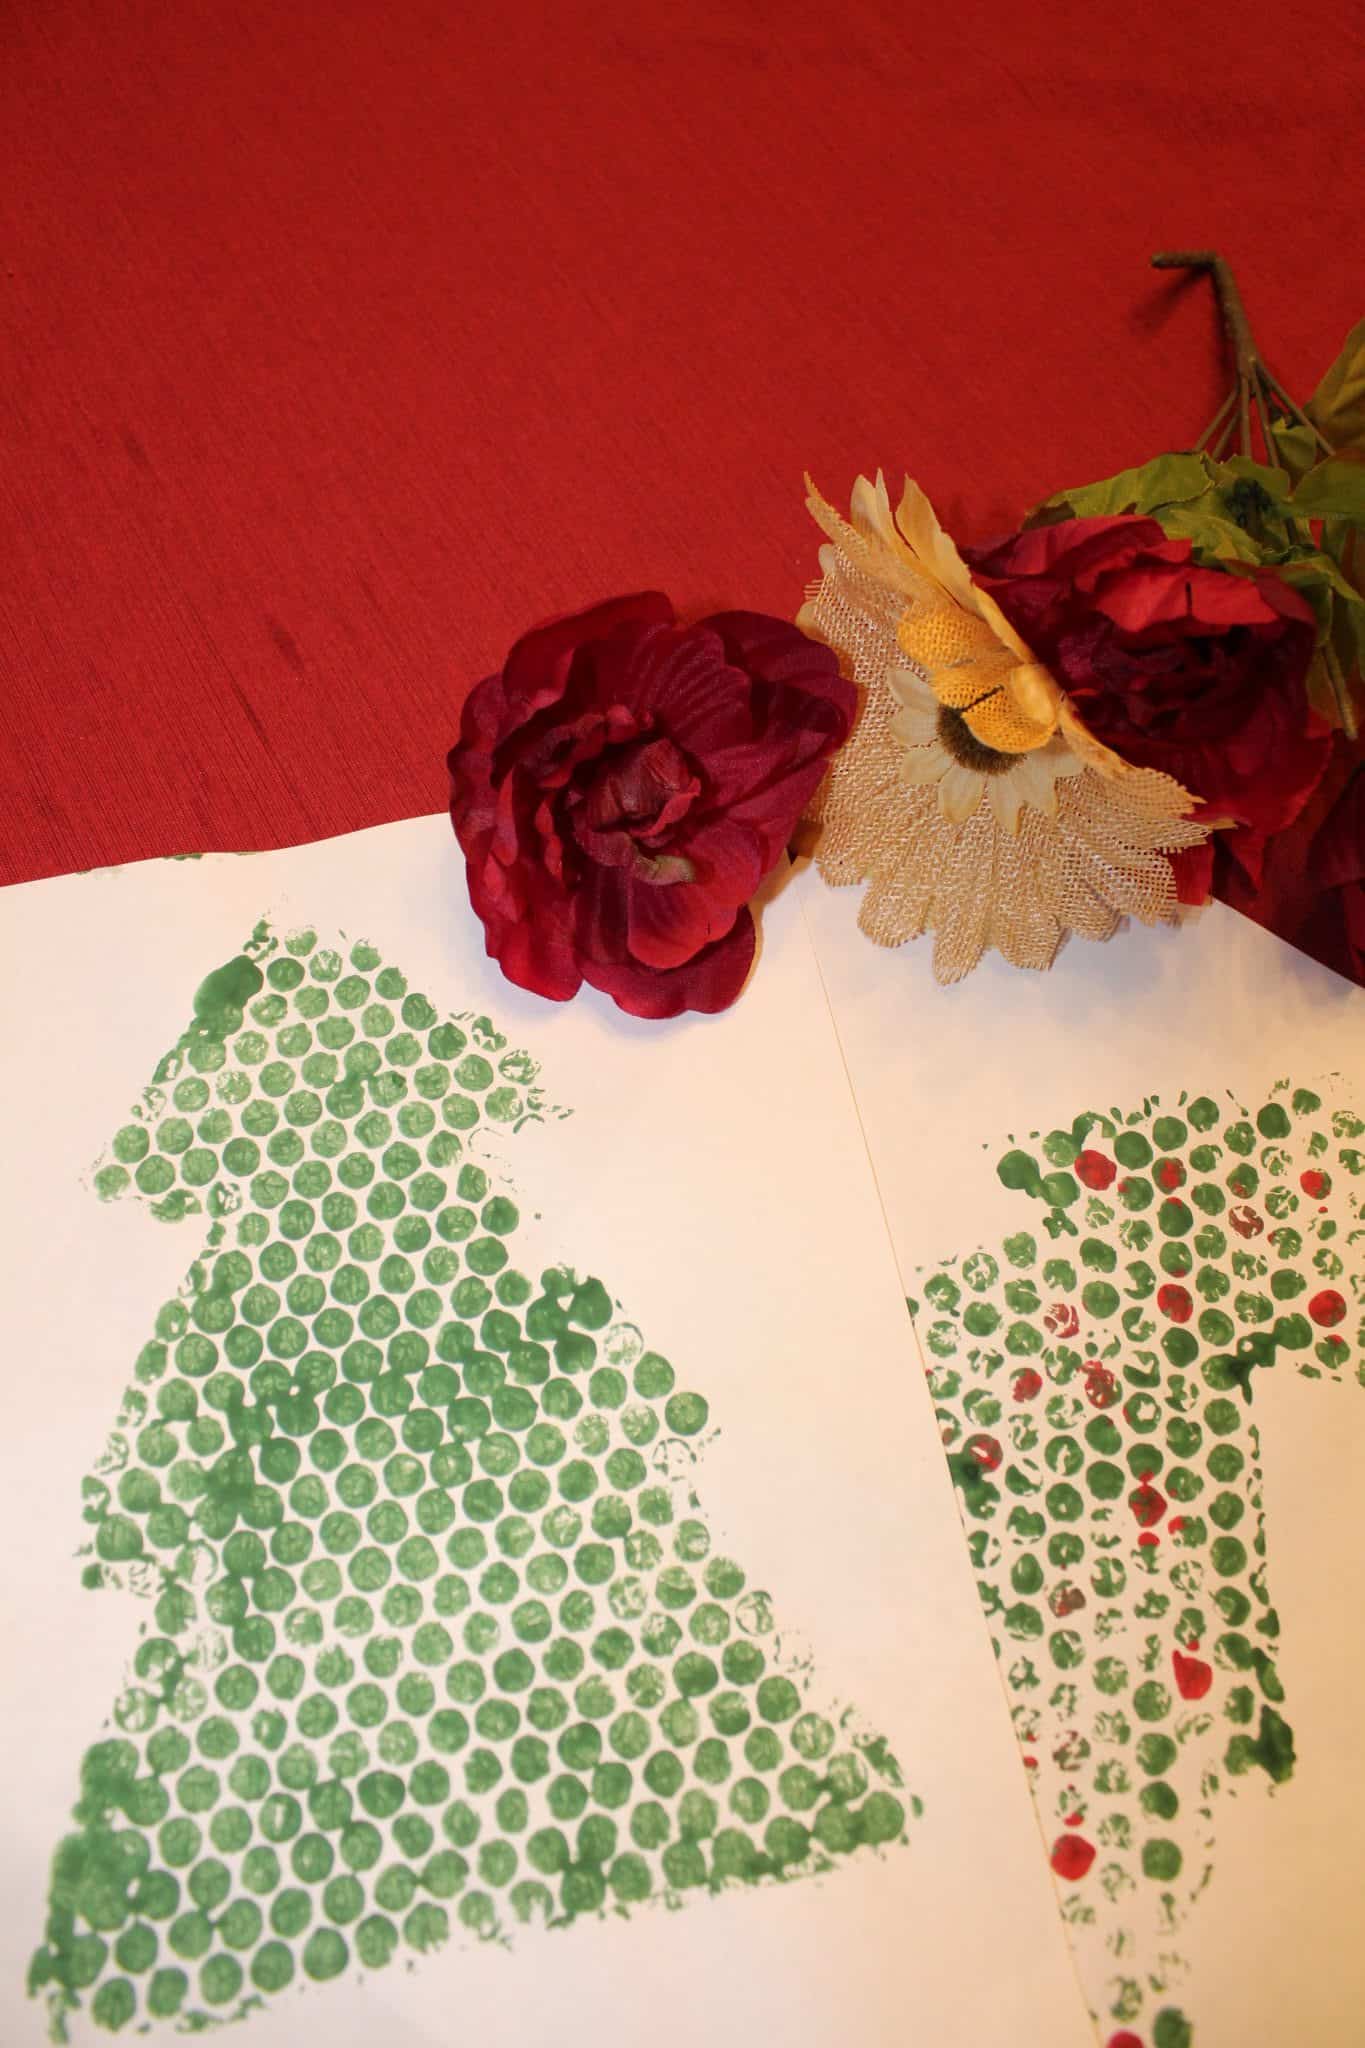
Take your bubble wrap and set it bumpy side down. Using a permanent marker, trace a Christmas tree shape onto the smooth side. Make sure that your tree is no bigger than a standard sheet of paper, or your prints won’t come out quite right.
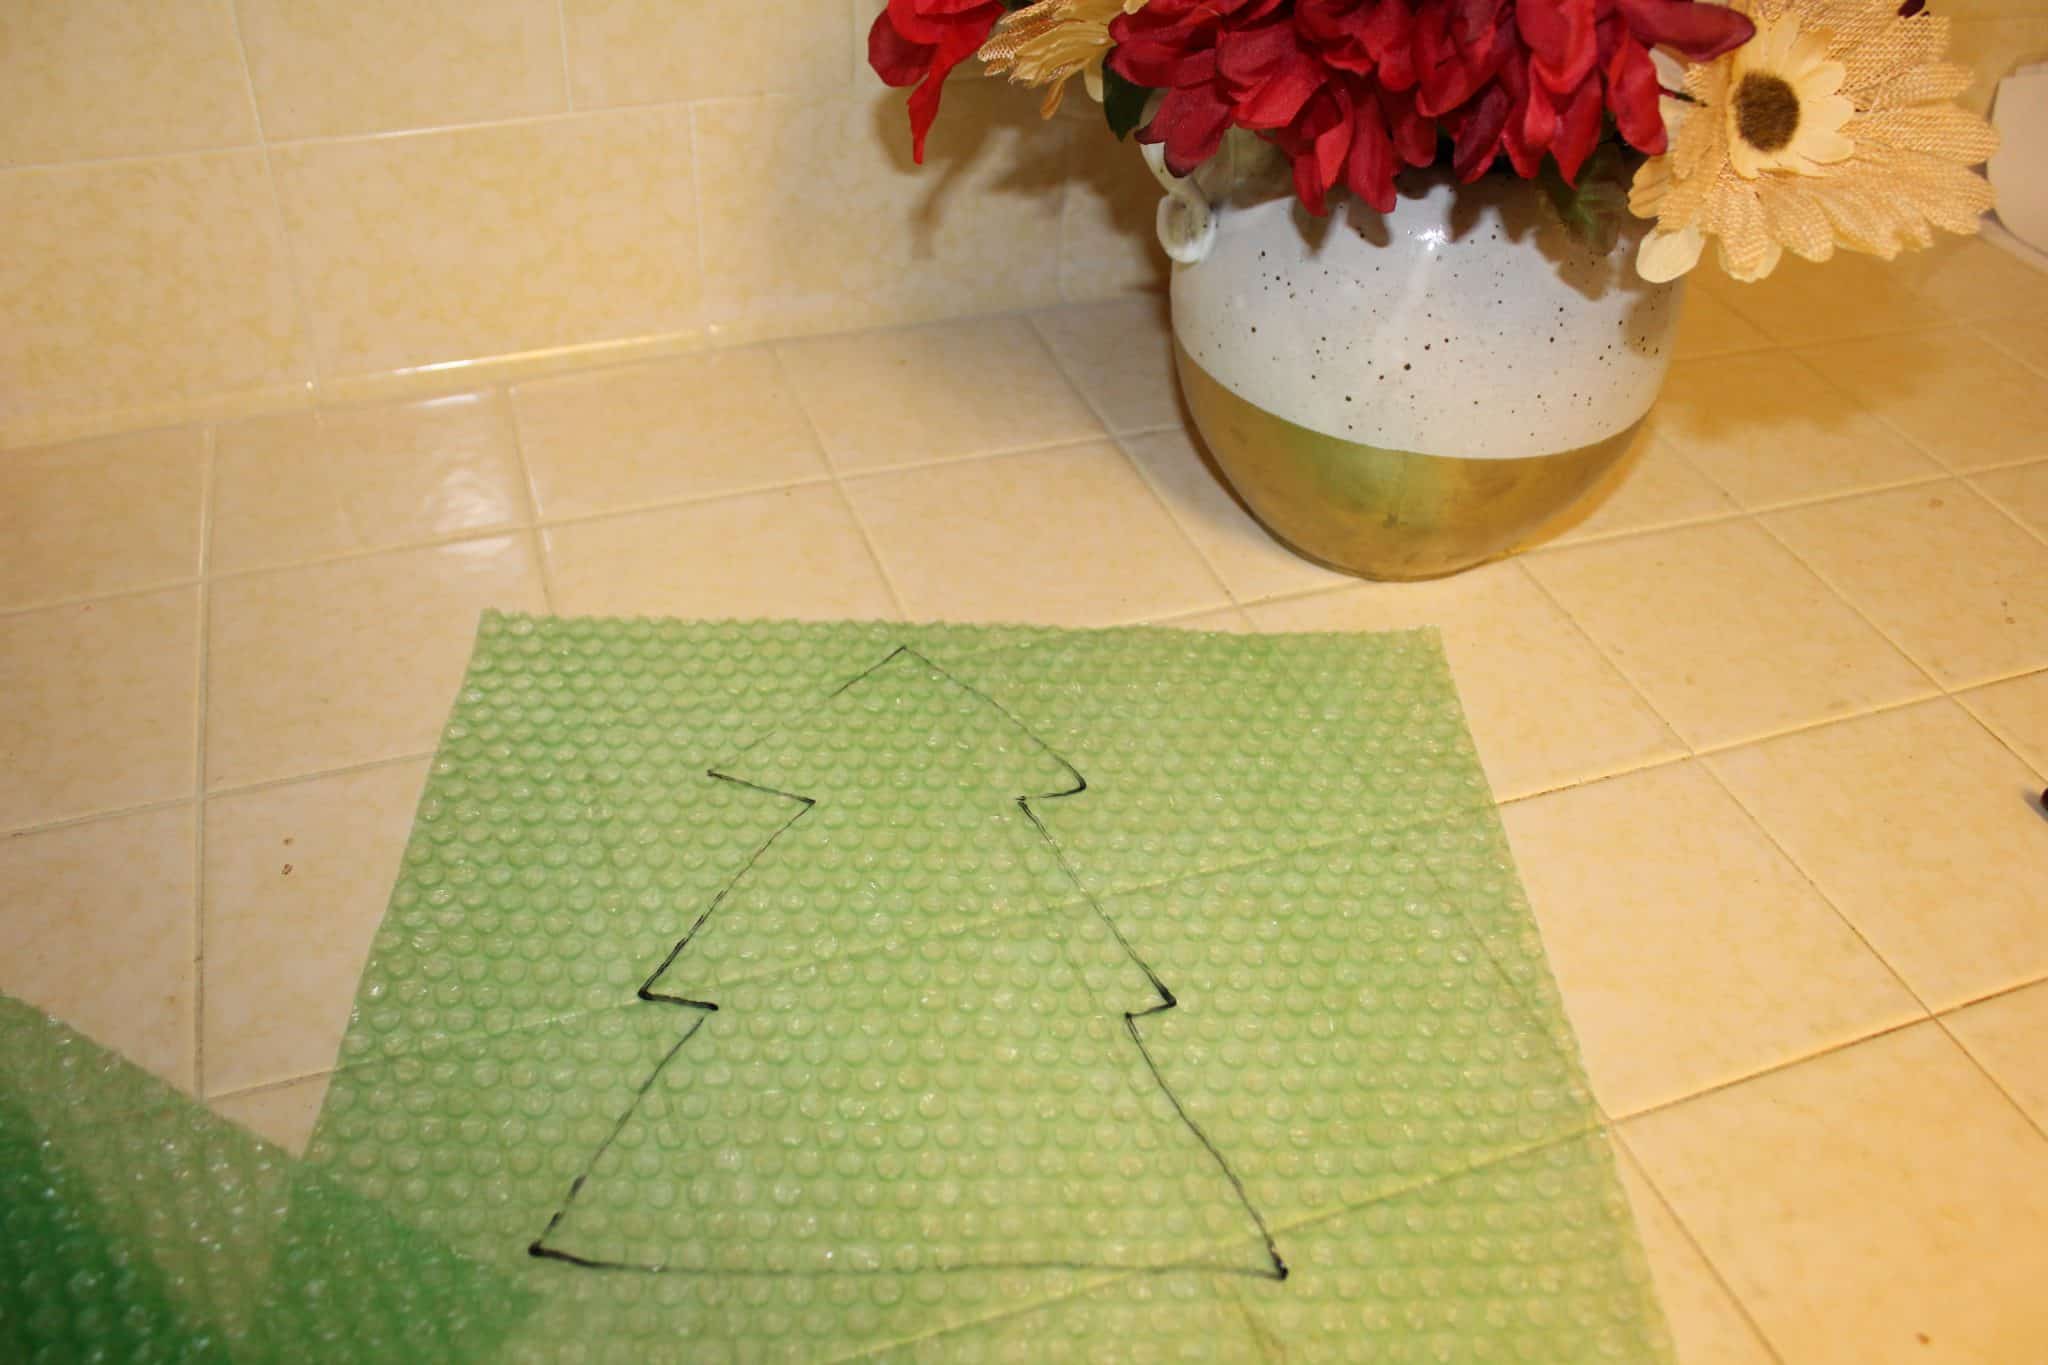
Cut around your line to make a Christmas tree shaped piece of bubble wrap. I made both larger (paper) sized ones and smaller ones, with the idea that I could later turn them into ornaments.
Now you’re going to tape your Christmas tree print form onto your painting surface (I like these painting mats, but a placemat or the table will work fine). Place a couple pieces of tape on the back (smooth) side of the bubble wrap. I recommend one piece on the top and one on each of the bottom corners.
Related Post: The Cutest Handmade Ornaments Kids Can Make
Christmas Tree Painting Time!
Place the mat in front of your child, along with a little pot of green paint and a brush (we like these chunky brushes from Melissa and Doug, which make for a fantastic stocking stuffer!).
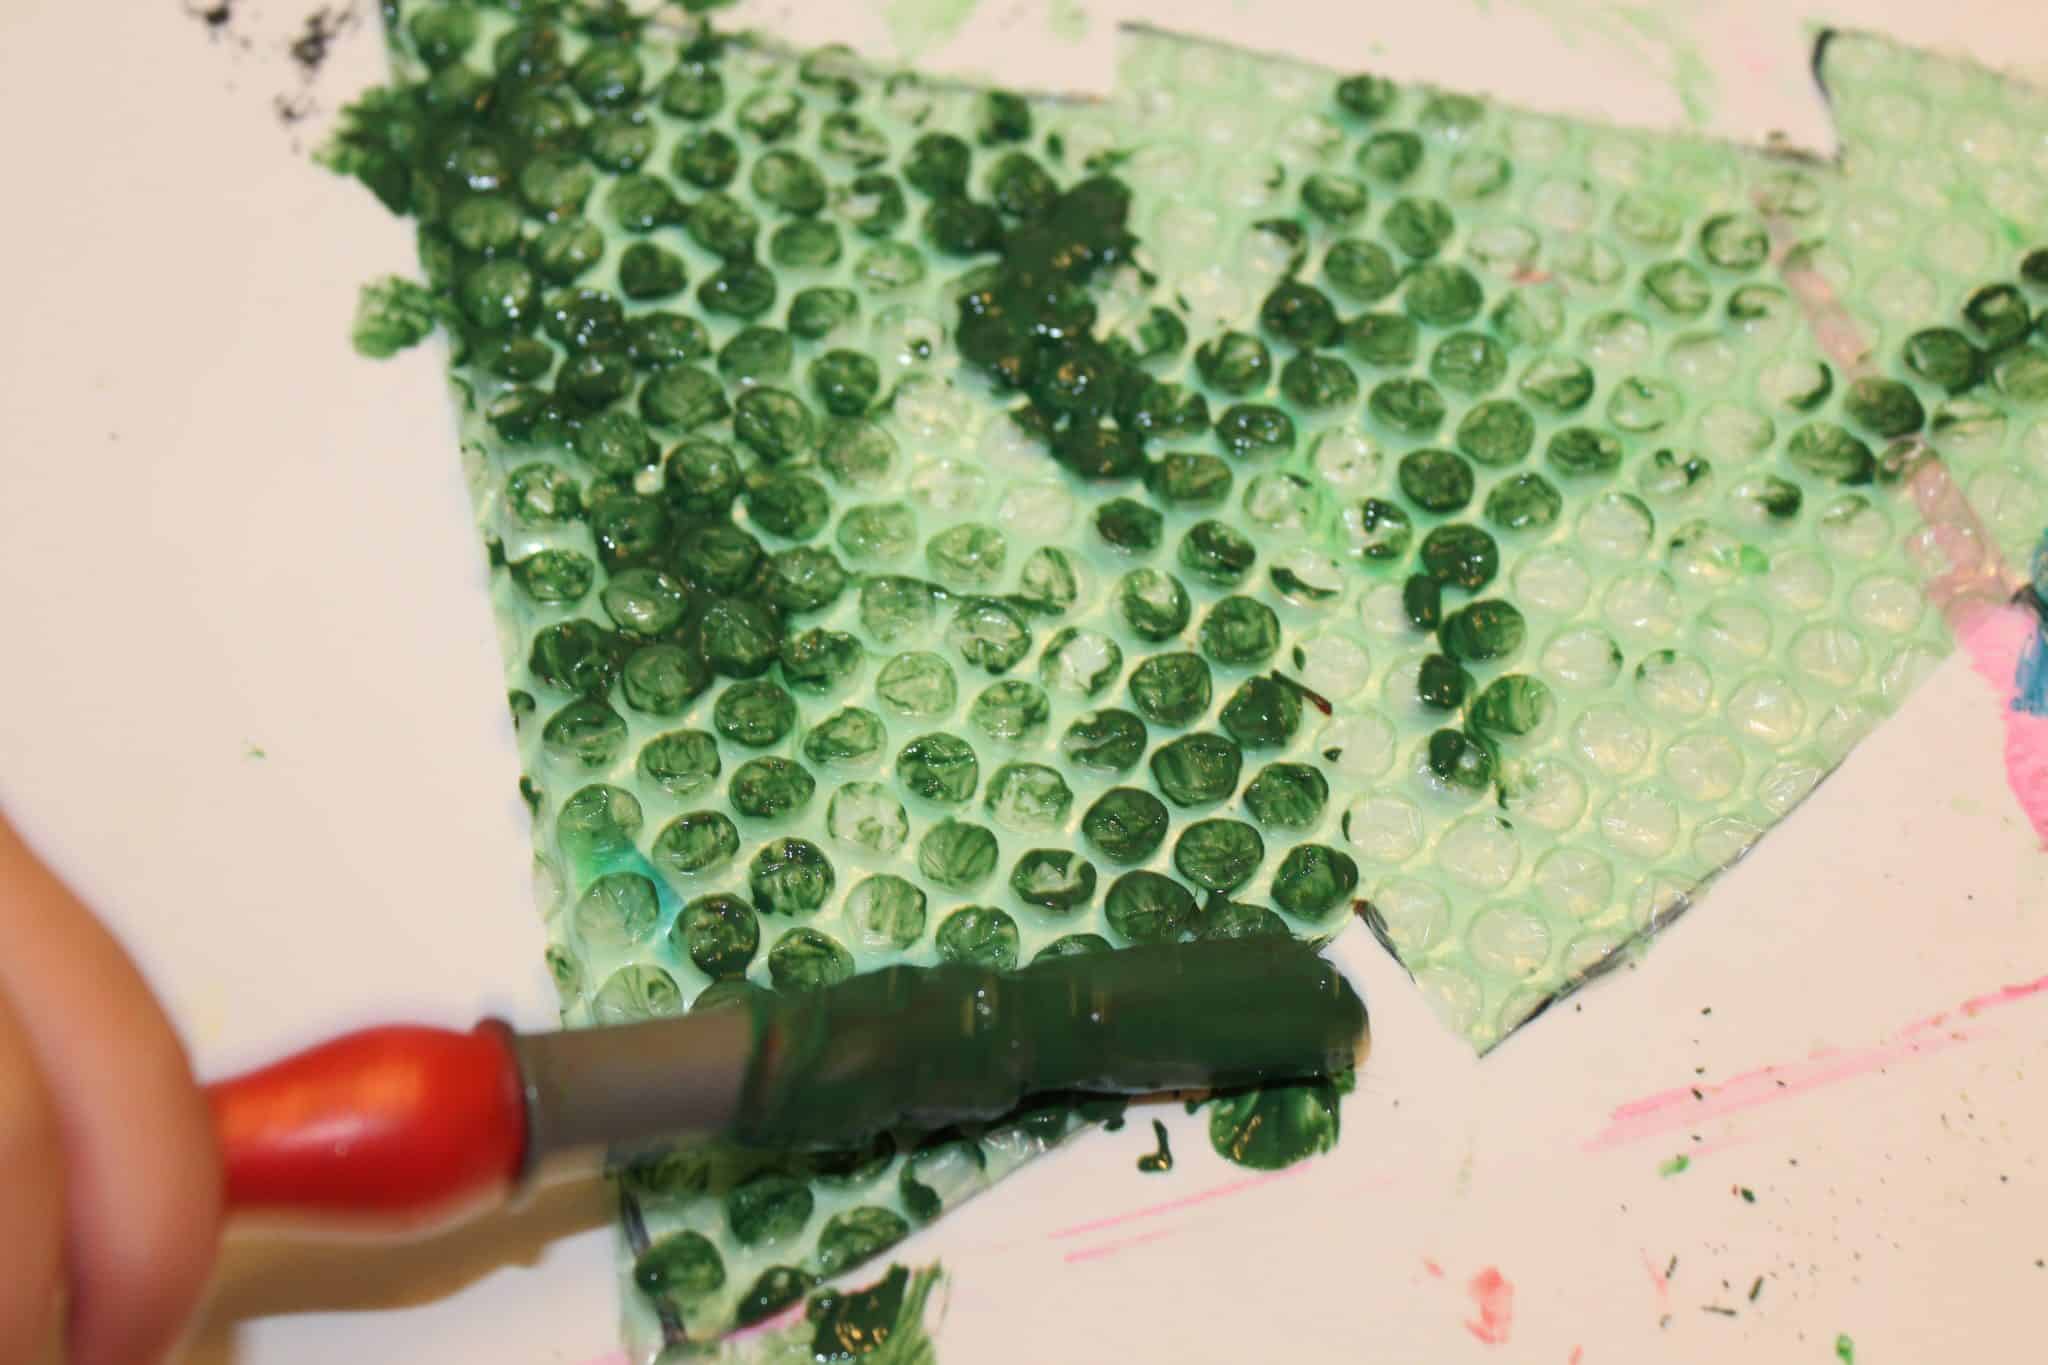
Odds are, they’ll just start painting the bubble wrap without prompting. If they don’t, encourage them to see what happens if they paint the Christmas tree. My bubble wrap was already green, but I imagine that this would actually work better with clear, as you could prompt them to make the tree green.
Christmas Tree Print Making
When the bubble wrap tree is pretty well covered with paint, you’ll move the bubble wrap tree off of the painting mat and onto a clean surface (I just moved it from one placemat to another).
This is important, as you want a clean surface surrounding the tree. Otherwise, excess paint will transfer and you’ll lose your shape.
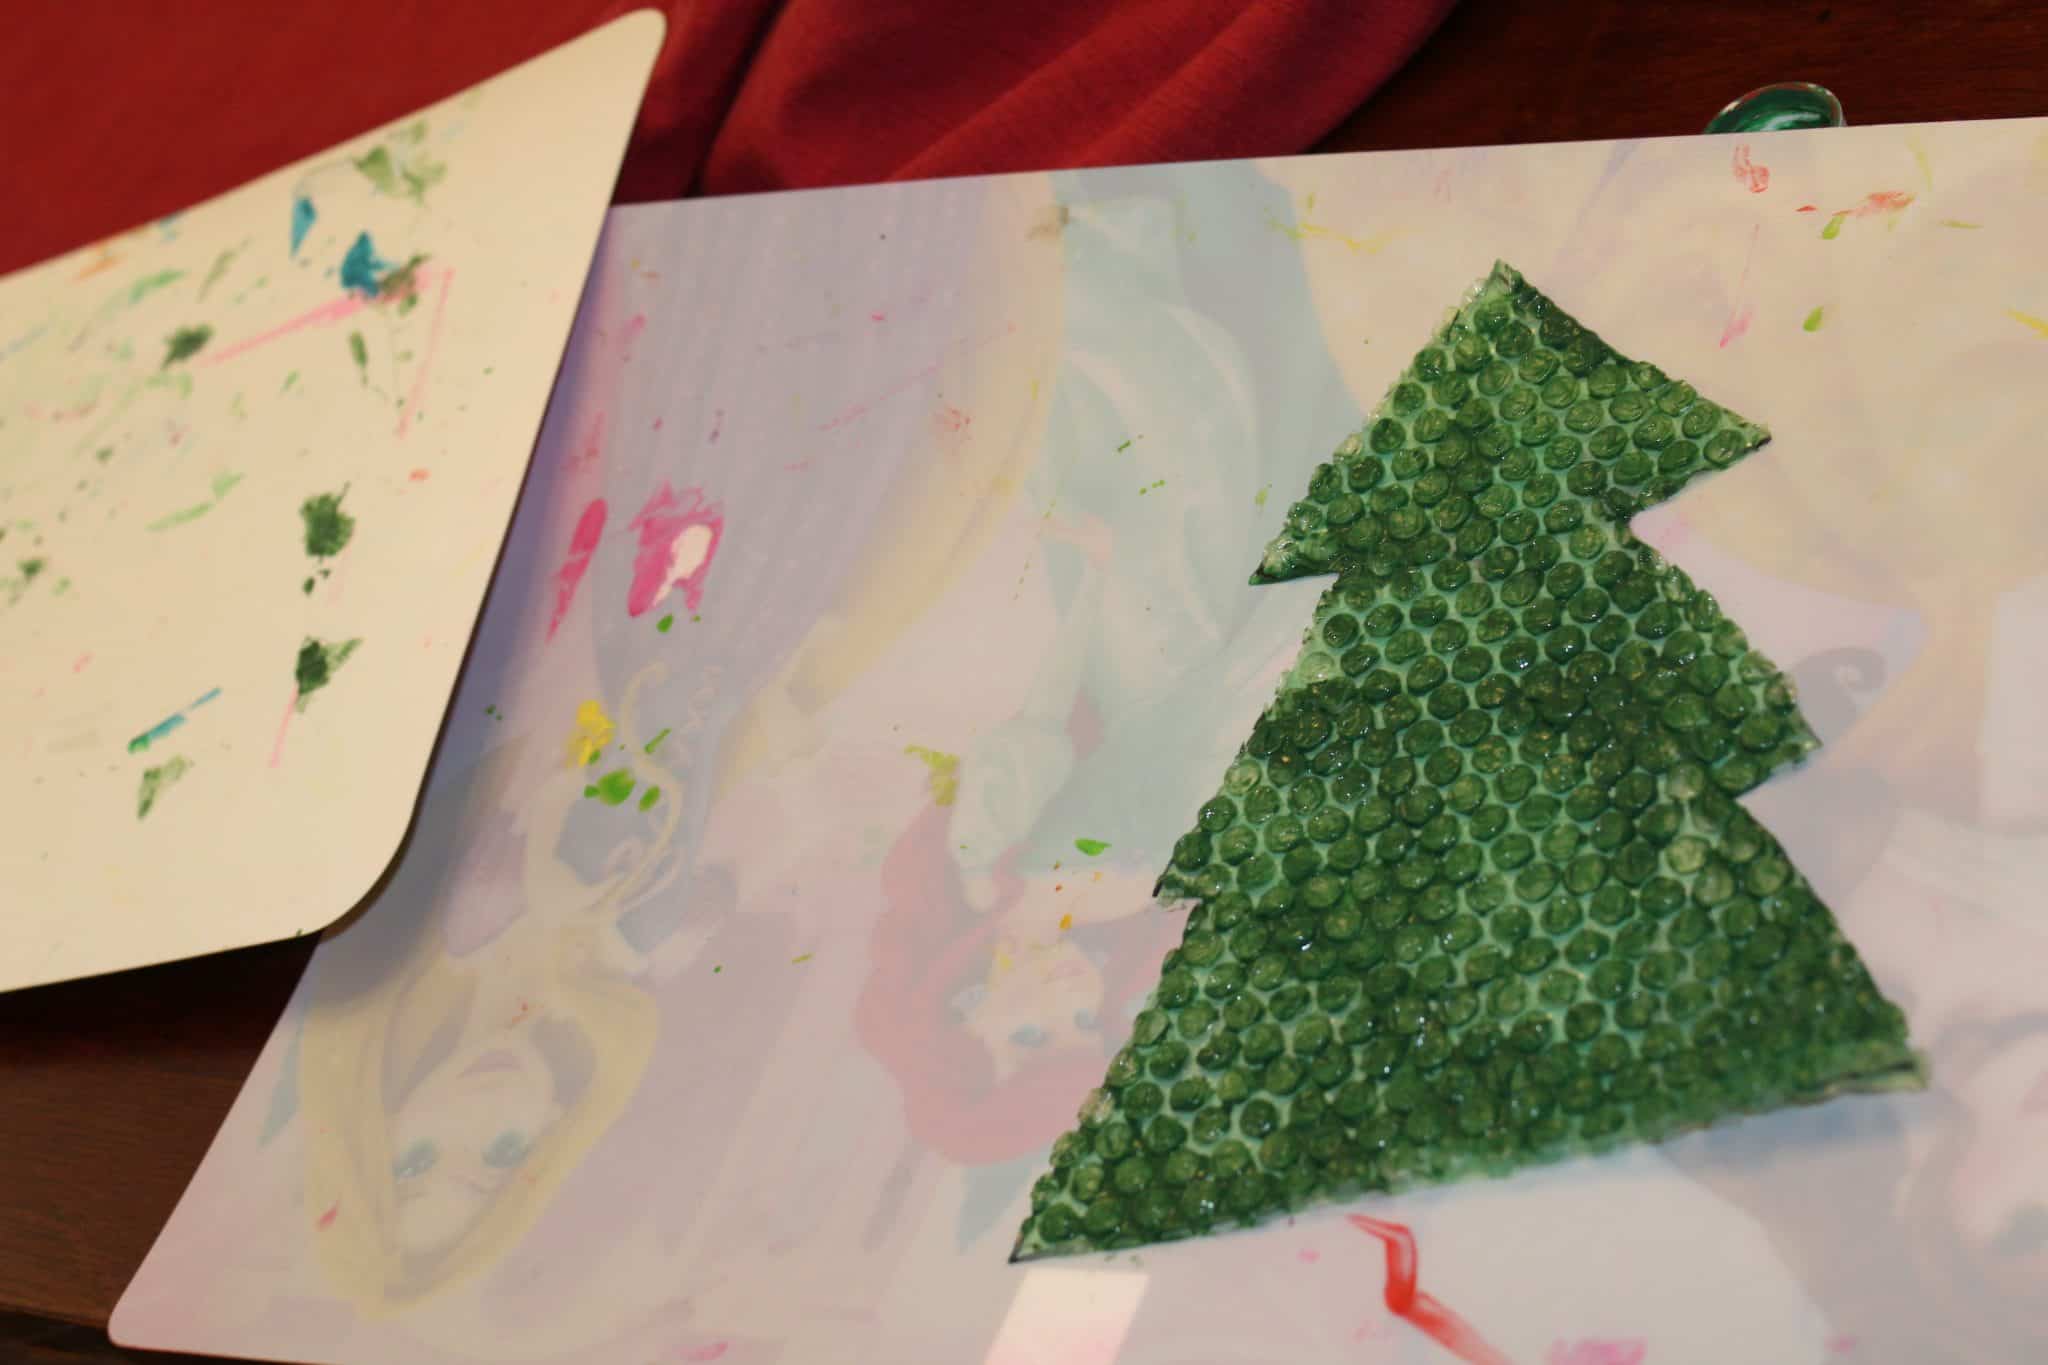
Place a piece of white paper over the bubble wrap and pat it down gently. If you’re Abram (or another two or three year old) you’re probably not going to go the gentle route- don’t worry, that’s half the fun (and it’ll still turn out fine).
Gently peel the paper away from the bubble wrap tree. Voila! Your paint will have transferred to the paper, more or less retaining the shape of a Christmas tree.

Related Post: Puffy Paint Snowman Art
Extending Your Christmas Art for Toddlers
You can repeat this activity again and again, using the same bubble wrap. Each painted Christmas tree will create two prints before it needs to be painted again.
When the paint starts to run out, simply move the tree back to the painting mat, add more green paint, and start the process again.
If you’re interested in getting more life out of your Christmas art project, you can allow the trees to dry and have the kids decorate them with markers, additional paint, or sticker ornaments. These foil stars work perfectly. You could also have them cut out gift ideas from a catalog and glue them under the Christmas tree print.
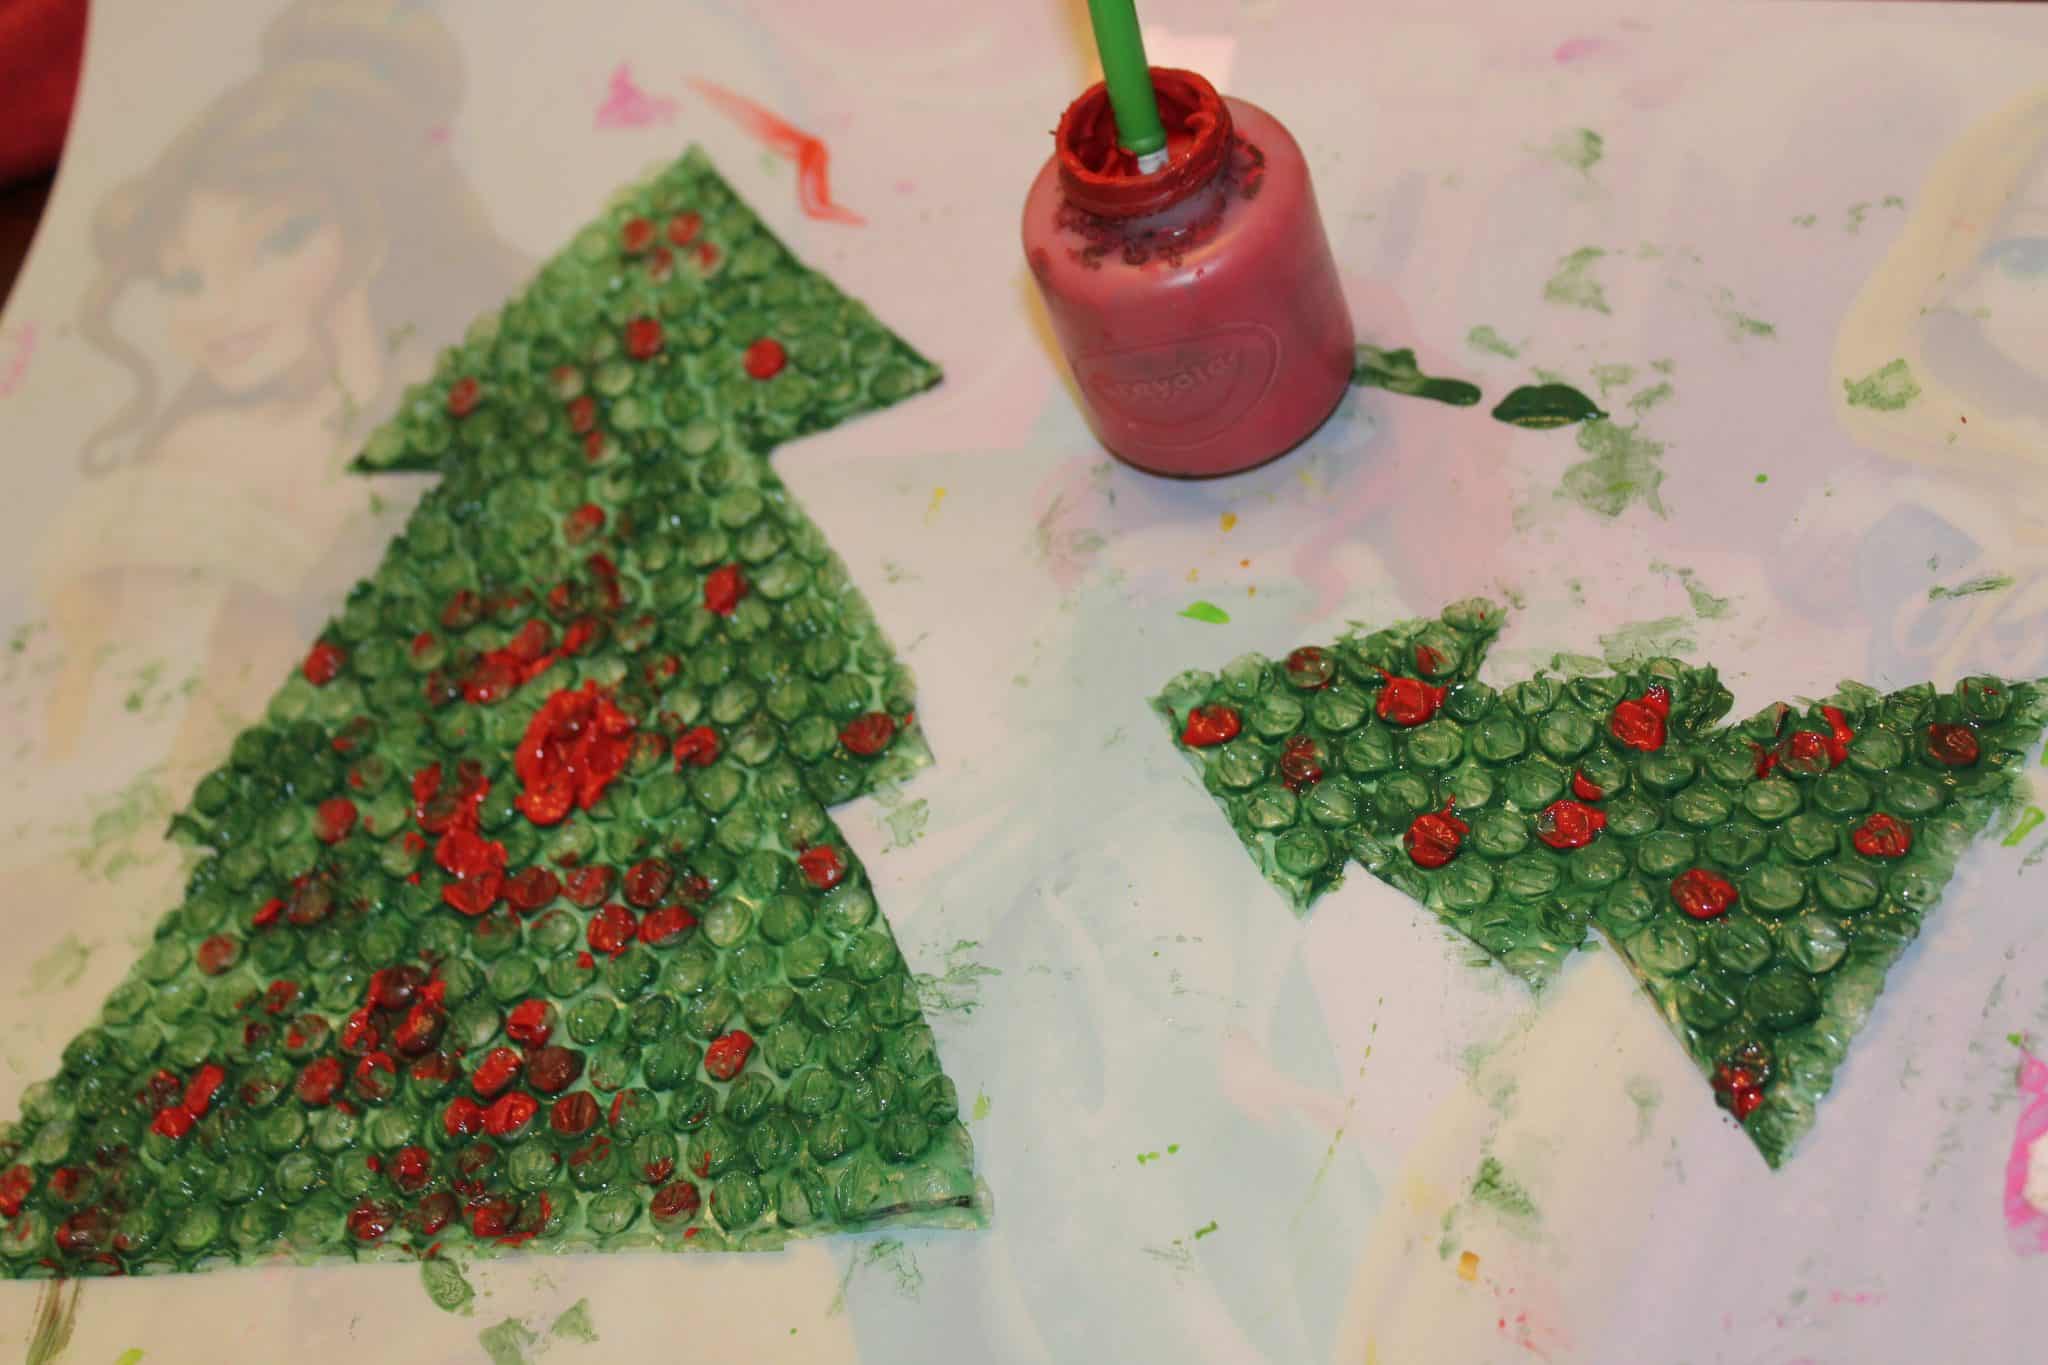
You can also add painted-on ornaments directly to the bubble wrap. After painting the whole Christmas tree green, give your child a pot of red paint and a clean brush. Encourage them to add some ornaments to the tree.
Abram loved coloring a few of the dots red- the circle shapes provided just the right amount of structure for him. He was thrilled when we finally peeled the paper away to reveal a fully decorated tree.
Now What Do I Do With All This Christmas Tree Art?
The only downside about this art project is that it creates a LOT of products. If your kids are into it, you may find yourself with a dozen Christmas trees on your hands.
If you’ve made smaller trees, I suggest allowing them to dry, cutting them out, and laminating them. With a hole punch and a little ribbon, you’ll have a keepsake ornament to treasure for years to come.
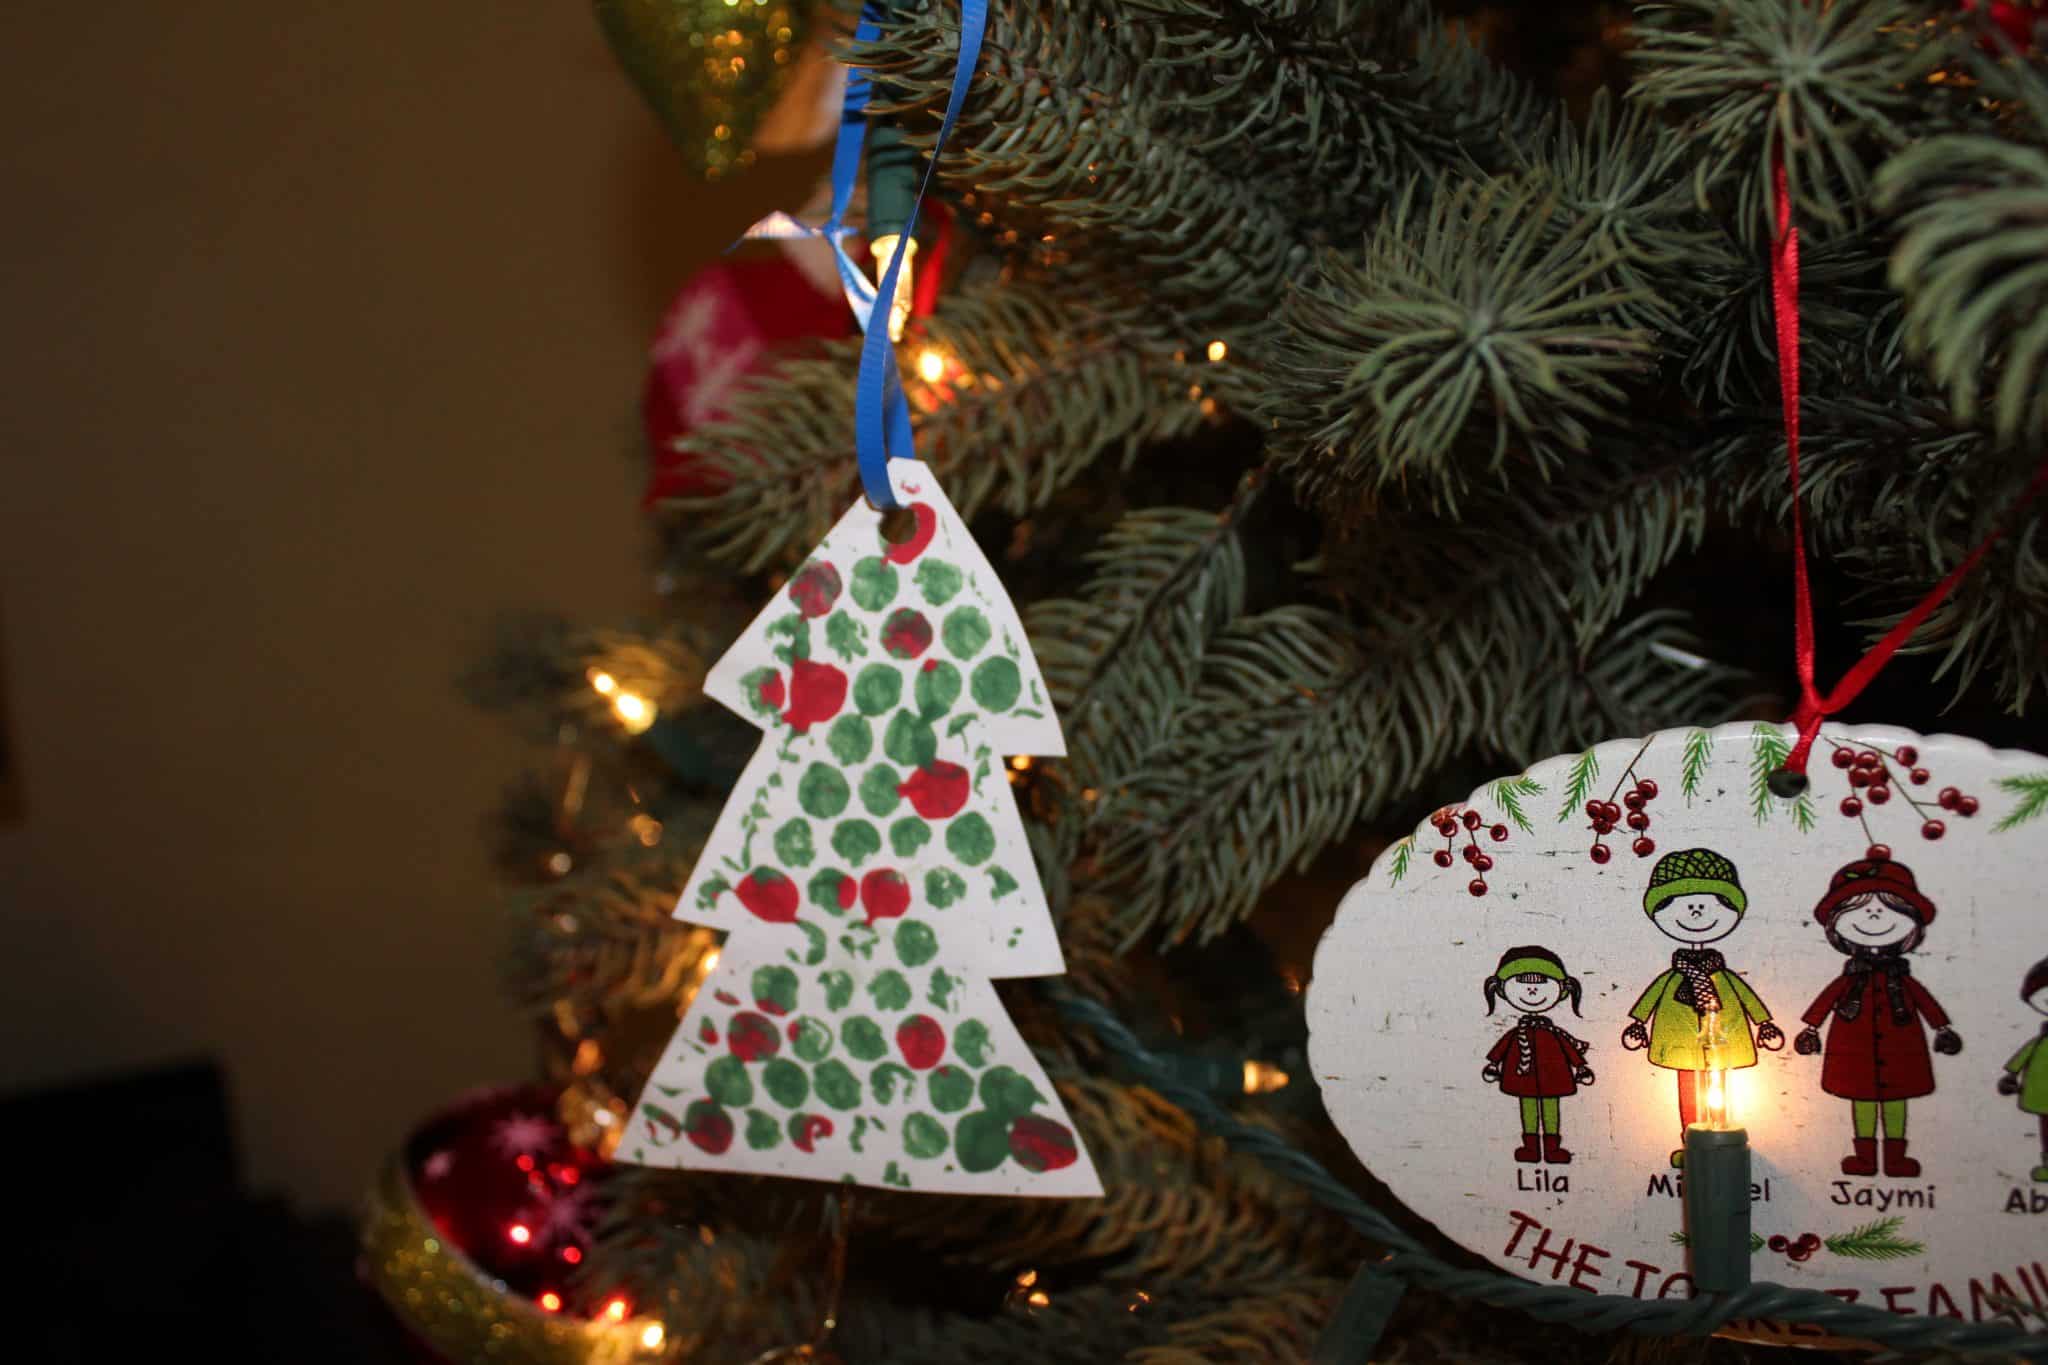
If you’ve made larger trees, congratulations! You’ve now got a dozen or so handmade Christmas cards. Send them off to all the relatives you know (our collection of grandmas never get sick of receiving the kids’ art in the mail!).
And if you don’t want to mail them all off? We recommend throwing them away on trash-collection day. It’ll keep you from getting busted when your kid finds their art projects in the garbage.
Not that that’s ever happened to us. Obviously.

*******
Looking for more art inspiration? Check out these ideas-
Awesome idea!!
Absolutely love this Christmas craft. I’m all about easy and creative. This seems like it’s right up my alley! Thank you Salty Mamas