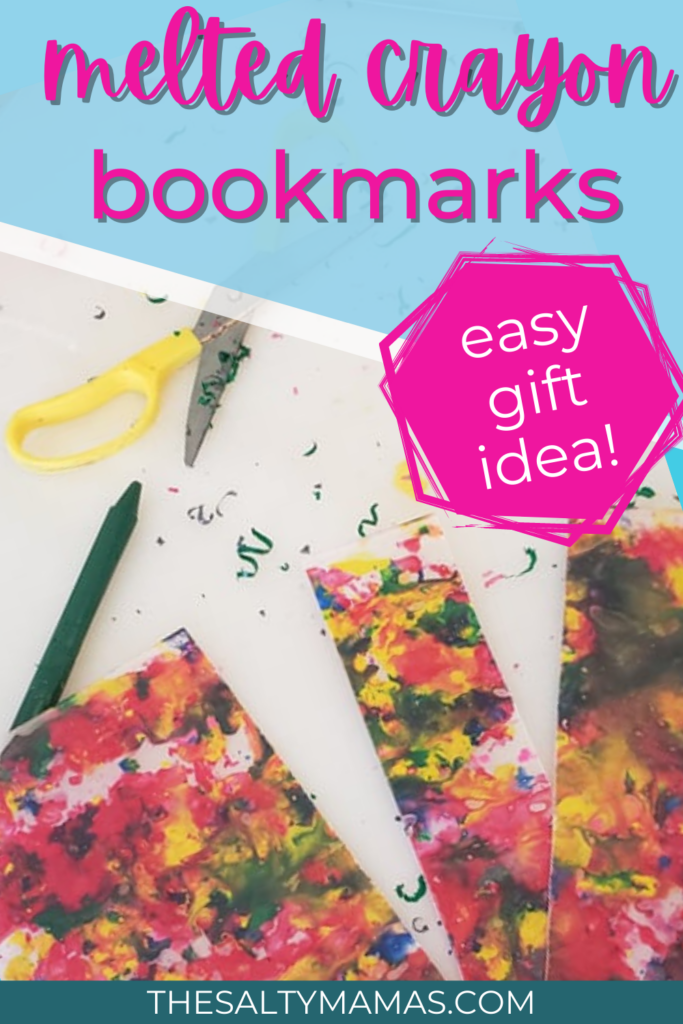
Looking for a fun way to use up broken crayons? Check out these melted crayon bookmarks! Using melted crayon shavings and wax paper, kids will love the process (and you’ll love the product of this melted crayon shavings art!)
Unfortunately, my kids grandparents all live pretty far away from us. Three of the four grandmothers live 9 hours away by car, and one lives a whopping 21 hours away!
I wish I could wrap up my kiddos’ love and send them in the mail. (Heck, I often wish I could just send my KIDS in the mail. But that’s frowned upon by the USPS).
This means we’re always on the lookout for little ways to send our love to the grandparents, and these melted crayon bookmarks fit the bill perfectly.
Using just a few items you probably already have- an iron, wax paper, and broken crayons- you can create beautiful new gifts (and have your kids practice lots of important skills, but don’t tell them that).
Kids will love the process of shaving down the crayons, watching them melt into “art,” and turning them into beautiful bookmarks they can use (or share).
We’ve got a few tips to minimize the mess and maximize the outcome. Read on for our full tips on how to make melted crayon bookmarks at home!
This post contains affiliate links. We may earn a commision from qualifying purchases. You can read more at our disclosures page. Thanks!
What Can You Do With Broken Crayons?
I don’t know about you, but we always have a ton of unwanted, half broken crayon boxes laying around. I can’t bear to throw them away, so I put them into a Ziploc bag to save for future broken crayon crafts.
Here are a few ideas of what you can do with broken crayons:
- Turn them into crayon shavings art, like we’re doing in this post.
- Donate unbroken crayons to a local school or preschool
- Break into pieces, place in a silicone mold, and melt to make new crayons
- Create drip art
- Add crayon shavings to your favorite slime recipe for a fun mix-in
Gathering Your Melted Crayon Bookmark Supplies
For this project, we will be making melted crayon bookmarks. To make these gorgeous creations, you’ll need the following supplies:
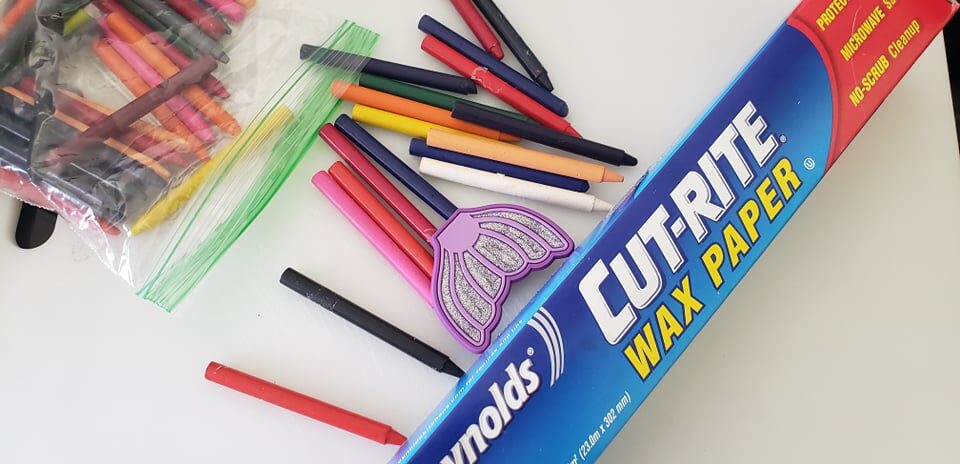
- Broken crayons, peeled and turned into shavings (see below)
- Wax paper (two pieces of equal size- one to put shavings on, one to place over the top)
- An iron (this one has lasted us FOREVER)
- A pencil sharpener (note: may get ruined!), vegetable peeler, or kid scissors
- Contact paper (optional, but increases durability)
- A hole punch (optional. This kid friendly hole punch is great for all kinds of fine motor practice)
- 1/4 inch Ribbon (optional)
Related Post: Celebrating Read Across America Day at Home
How To Make Crayon Shavings
This process is SO FUN for kids! I like to spread this out over a day or two to make sure kids don’t get too tired of this project (leaving me to finish it for them!)
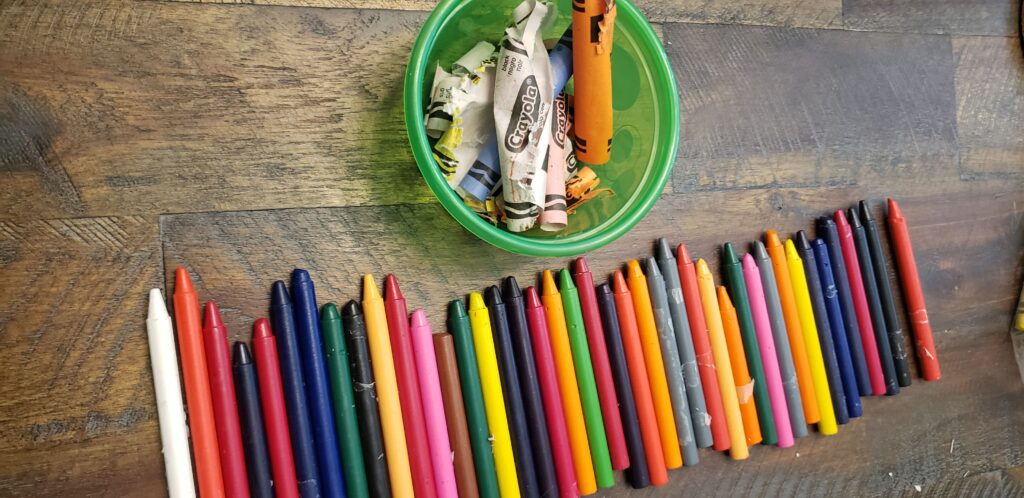
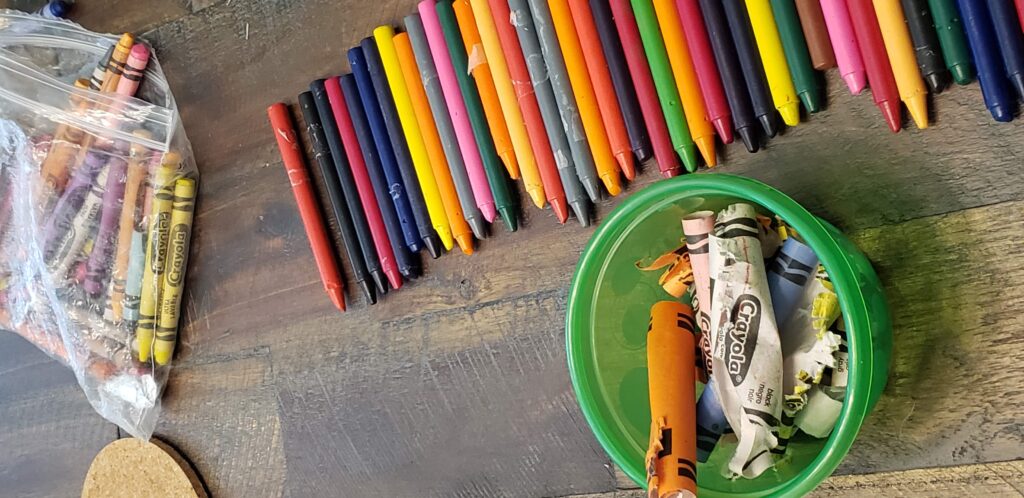
First up, you’ll need to peel the paper off the crayons. This is a suprisingly great fine motor skill for kids, and they actually think it’s pretty fun.
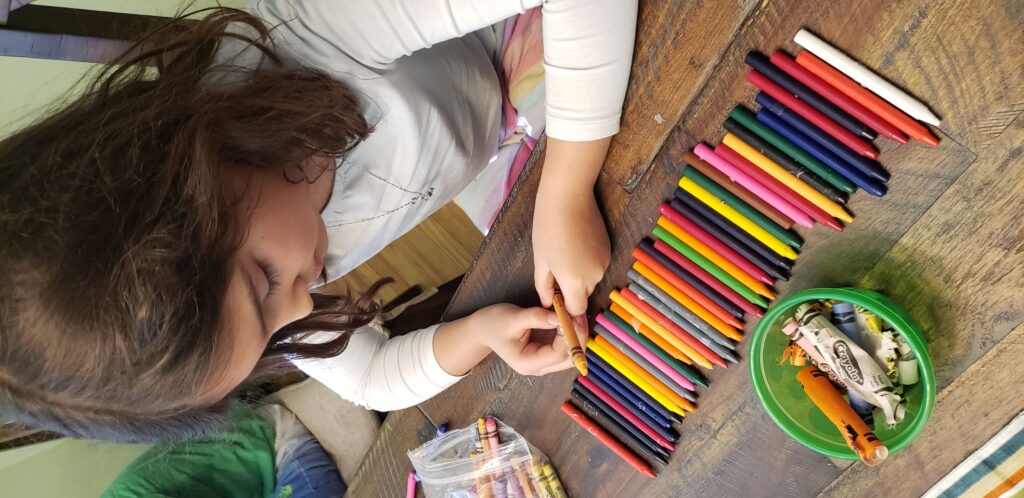
Next up, sort the crayons by color. You want to make sure you have colors that compliment each other (see below).
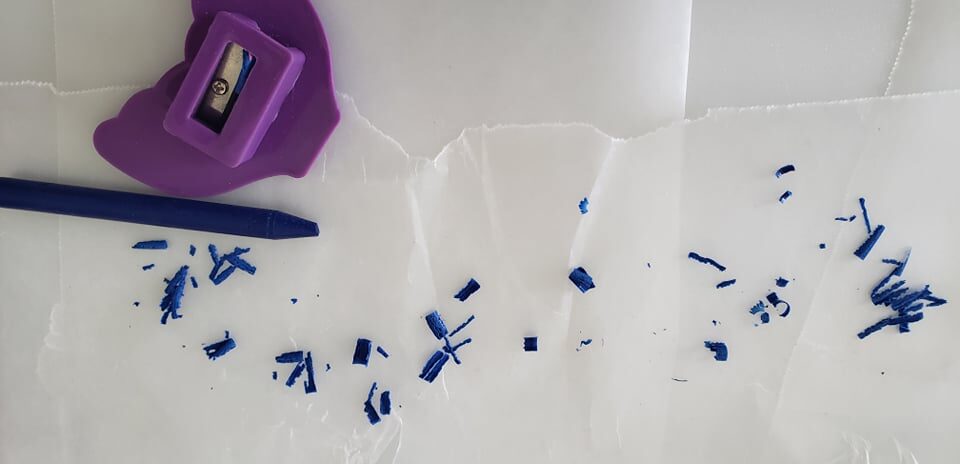
Then make your crayon shavings! The easiest way is to use a pencil sharpener (though full disclosure, it might be ruined for sharpening pencils after this!)
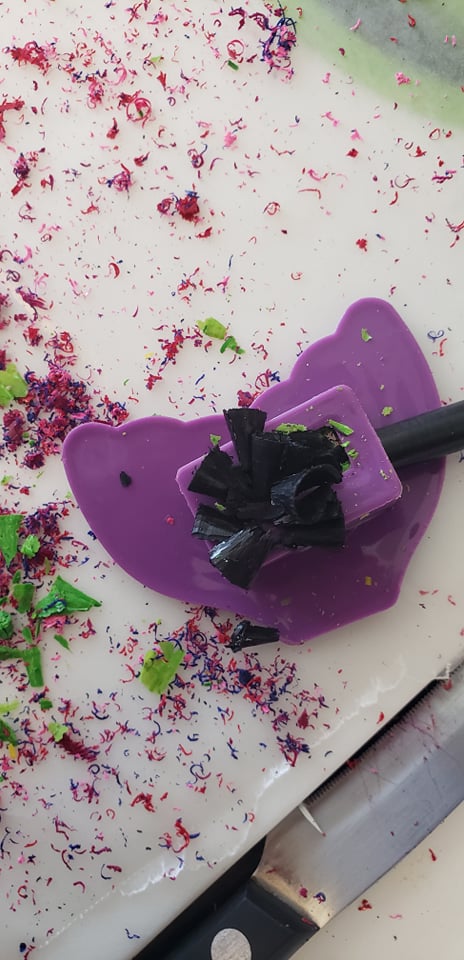
Kids can turn the crayon in the sharpener and let the peels drop into a bowl, or directly onto the wax paper.
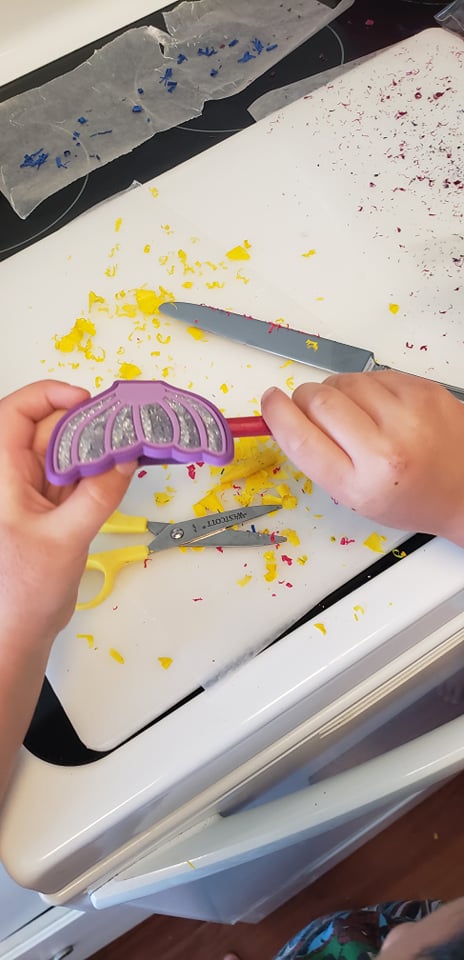
We also experimented with different methods, including a vegetable peeler, the edge of kids scissors, and a butter knife. I let the kids decided which tools to use, but in the end, the pencil sharpener won out for us.
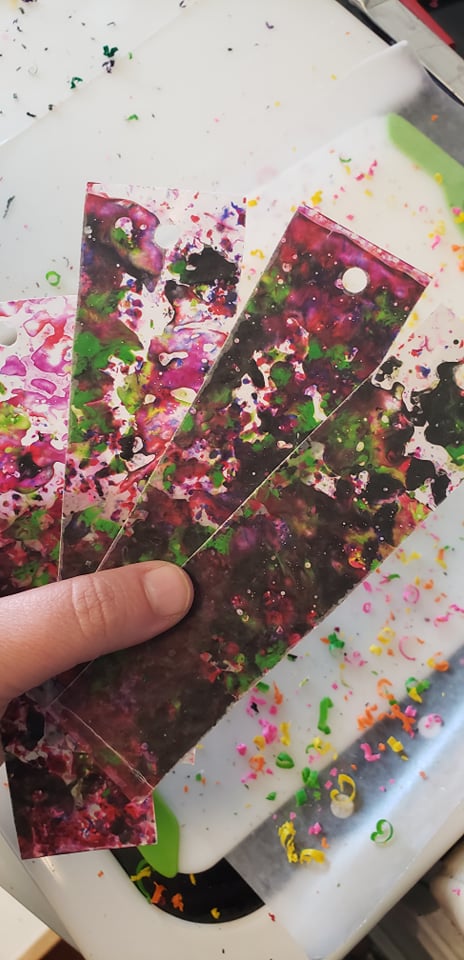
What Colors Look Best for Melted Crayon Art?
I let my kids choose the colors they wanted to use, and consequences be darned. They naturally chose about three colors each, and the results were beautiful.
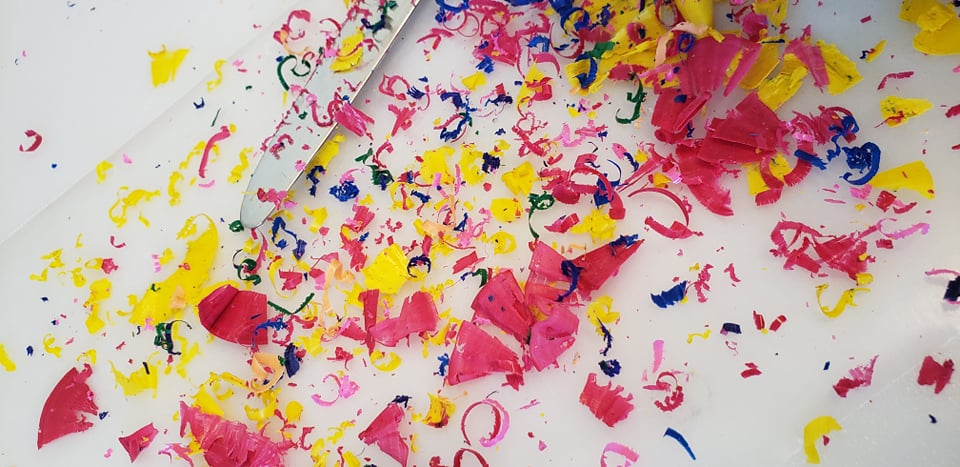
The more colors kids use, the more likely the colors will combine in unwanted ways (aka turn a muddy brown). We recommend letting them choose three or four colors max.
Here are some color combinations that have worked well for us:
- Purple, lime green, and black
- Pink, yellow, and dark blue
- Shades of a single color (ie light blue, dark blue, turquoise)
- Warm colors (red, orange, yellow)
- Cool colors (green, blue, purple)
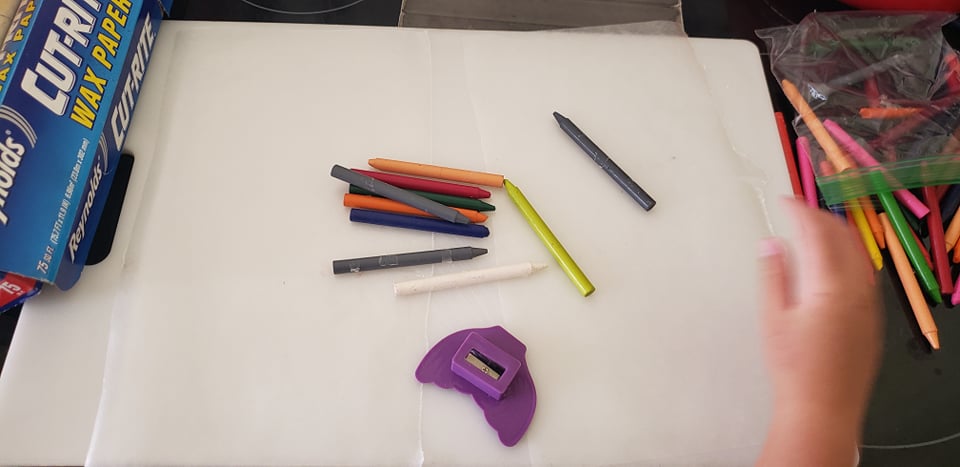
Kids can make patterns, designs, or just drop the shavings onto the wax paper randomly (that’s what we did).
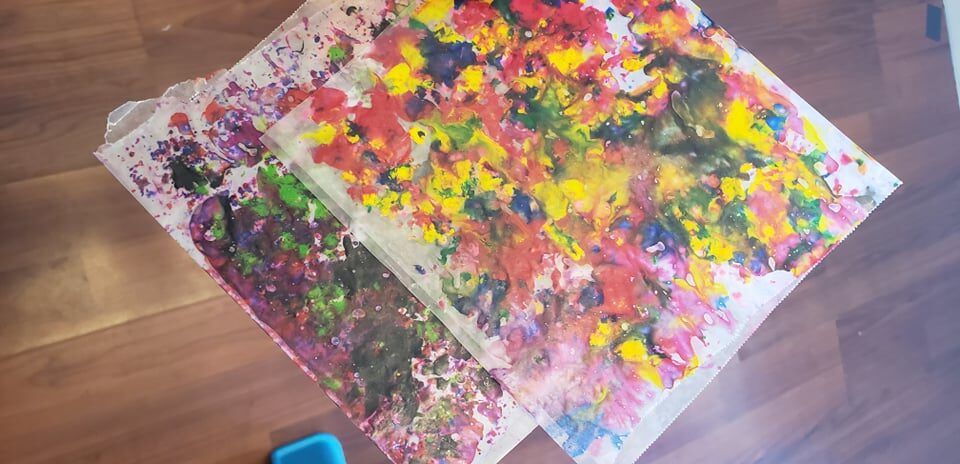
You want to cover most of the wax paper. However, the melted crayon shavings will increase in size, hopefully covering any remaining white space.
Related Post: Baking Soda and Vinegar Process Art for Preschoolers
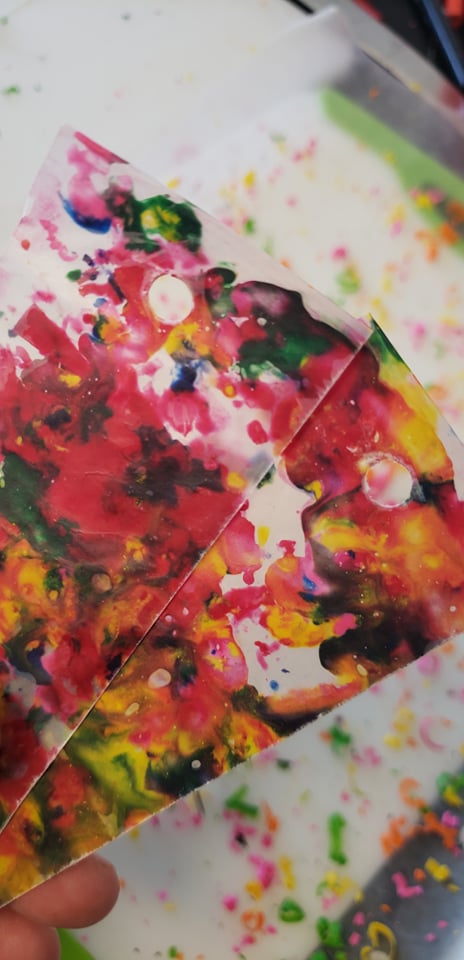
Melting Crayon Shavings in Wax Paper
Once you’ve sprinkled your broken crayon shavings onto the wax paper, you’re ready to melt the crayon shavings between the pieces of wax paper.
Heat your iron on its lowest setting.

Place the second sheet of wax paper on top of the first. Cover with a rag or towel (one that you don’t love, just in case) and iron lightly over the top of the wax paper, for 10-15 seconds.
Check your art for any unmelted areas, and reapply heat as needed.
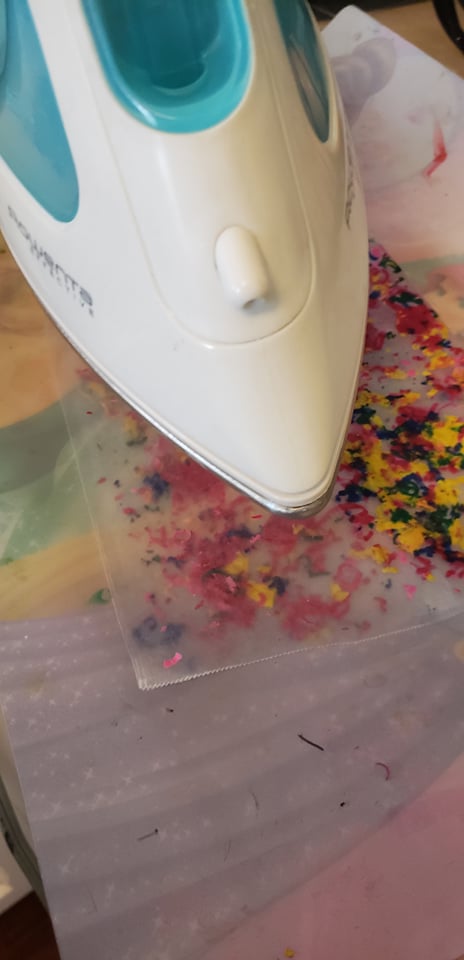
I also found that just holding the iron above the wax paper was enough to melt the crayon shavings, letting me hit unmelted spots without using the towel (or ruining my iron!)
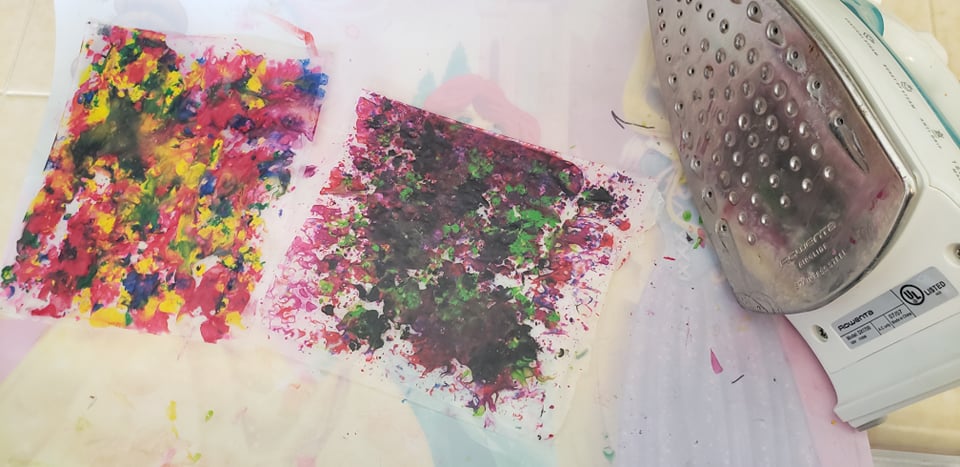
Allow the crayon shavings to cool completely before moving to to the next step.
Related Post: Stamp Art Project for Kids Using Cookie Cutters
Turning Crayon Shaving Art into Bookmarks
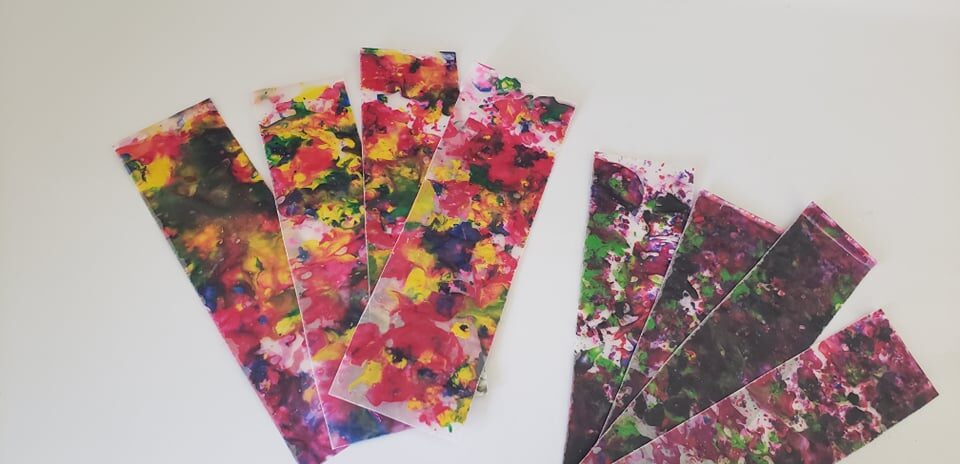
Once your melted crayon shaving art has cooled completely, trim the wax paper down to bookmark size. I cut them to about 1.5 inches wide and 5 inches long.
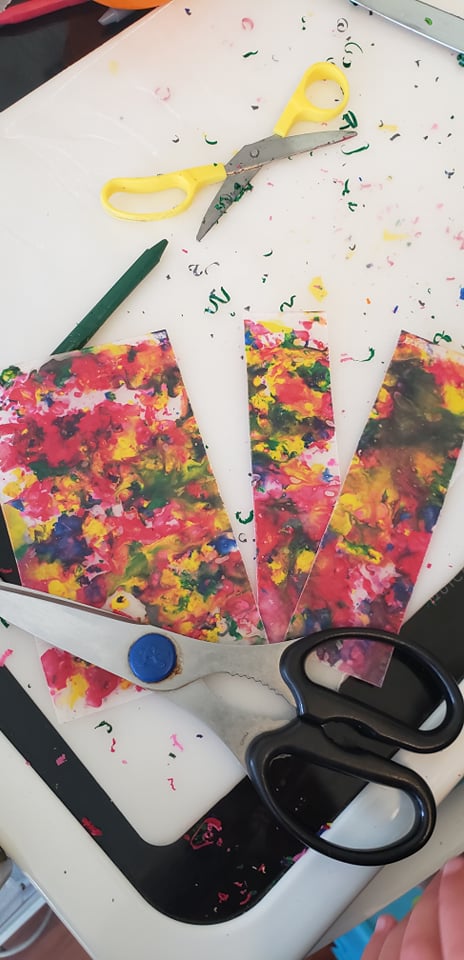
At this stage, you might want to cover the bookmarks with contact paper for extra durability (ie if your kids are going to use them). For adults, the wax paper should be sufficient.
If you’d like, use a hole puncher to make a hole about 1/2 inch from the top of the bookmark.
Fold a three inch piece of ribbon in half. Put the folded end through the hole.
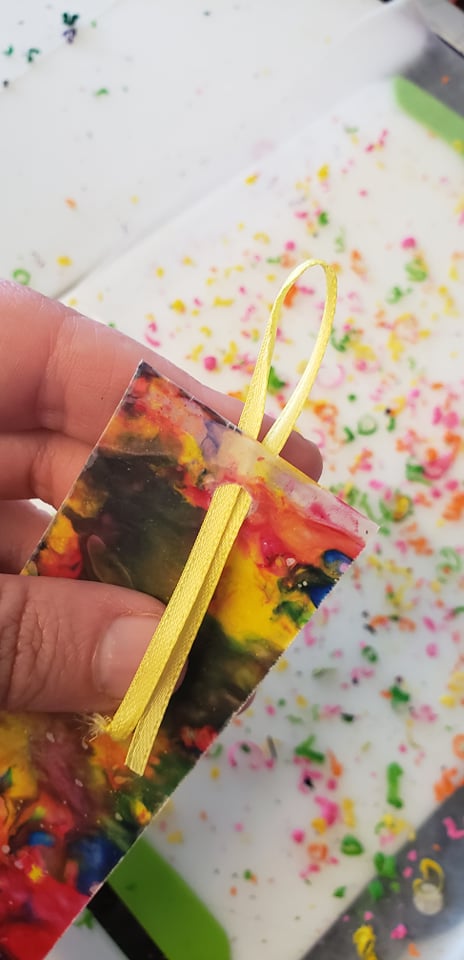
Put the ends of the ribbon through the loop made by the fold.
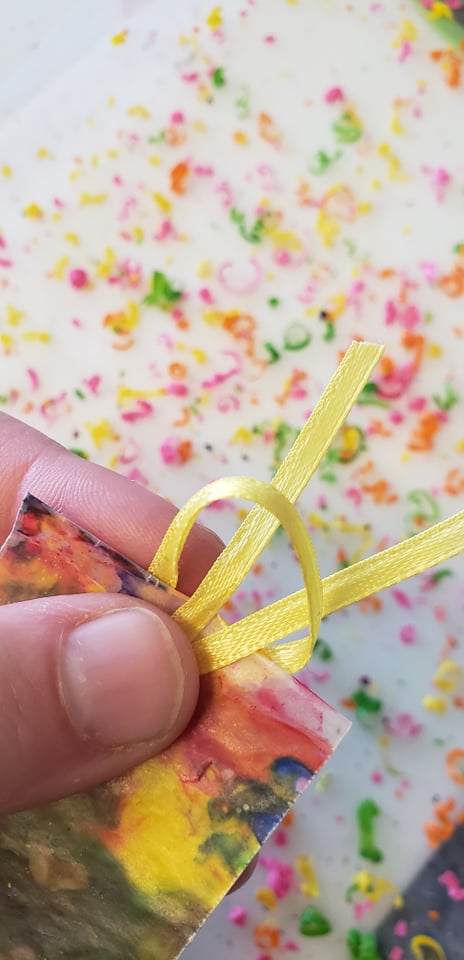
Pull until a loose knot is formed (not too tight, or the bookmark will tear!)
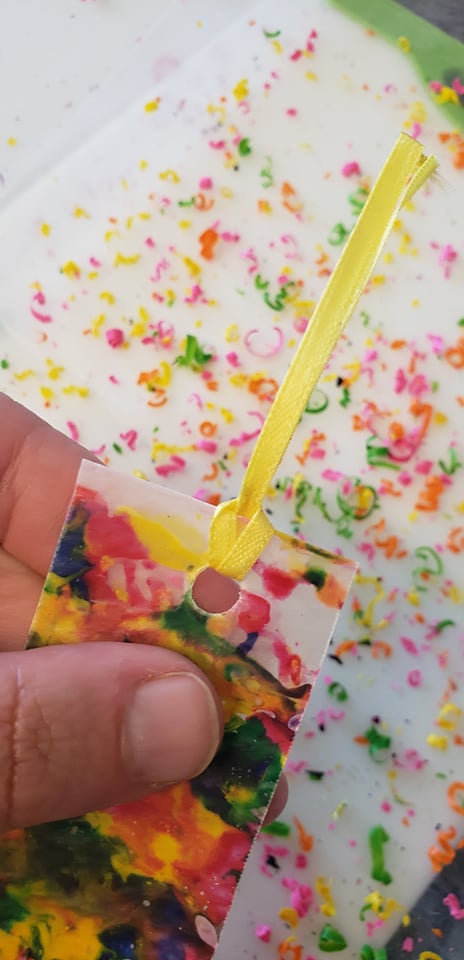
You can add a drop of glue to keep the knot from coming undone, or leave it as is.
Related Post: Kids Get Creative with Process Art for Toddlers
Cleaning Up
Not gonna lie- this activity does make a bit of a mess. Make sure to do this activity on a hard surface that can be easily swept or vaccumed. You may want to do this activity on a mat that can be shaken out afterwards, or rinsed off.
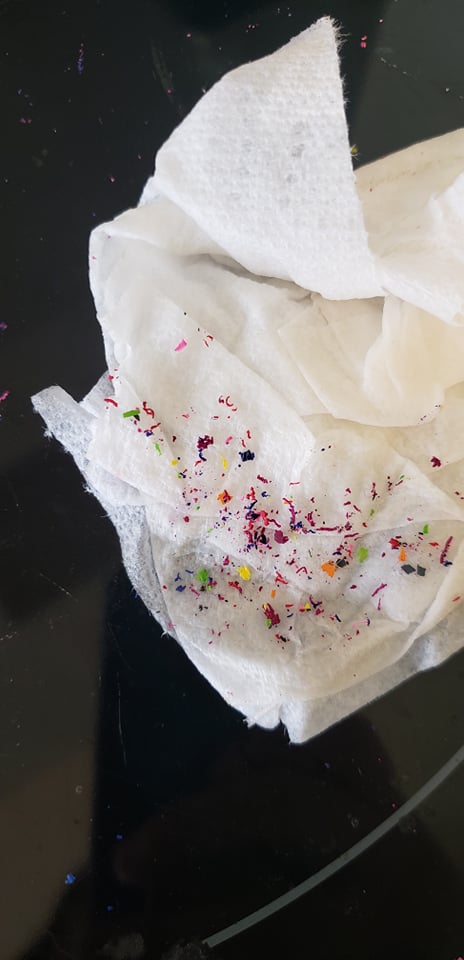 First, clean your work surface. We did these directly on our counter, so I brushed the excess crayon shavings onto the floor. Pick up any leftover tiny pieces with a wet paper towel.
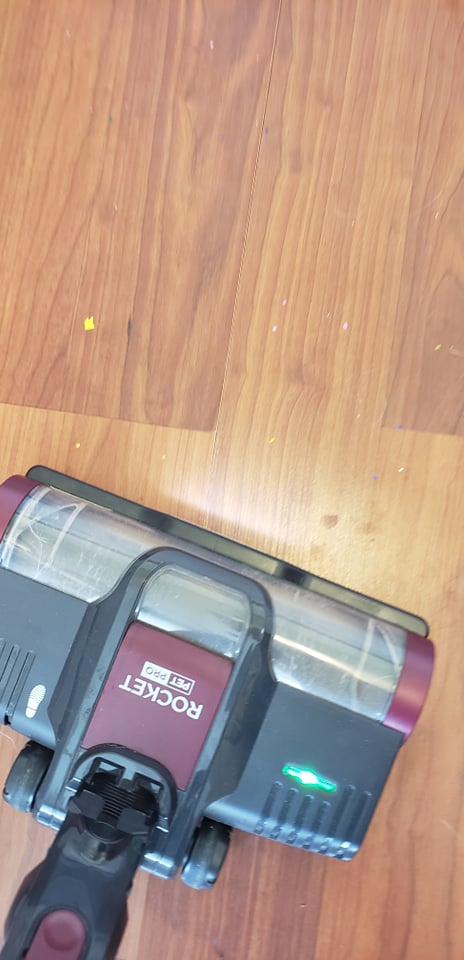
Then vacuum or sweep up the crayon shavings from the floor. Again, use a wet paper towel to pick up any that your vacuum miss.
Admire Your Melted Crayon Shavings Art!
Take a minute to admire your beautiful products! Snap a picture, place them in your favorite book, or mail them away as a sweet surprise for family or friends.
And don’t be suprised if your kids want to make a whole other set of melted crayon shavings art.
Let them create more bookmarks, or cut your wax paper into shapes and make stained glass art to hang in a window. The options are endless…and I bet your supply of broken crayons is, too!
*******
Our grandparents loved getting these beautiful melted crayon shavings bookmarks in the mail, and I still use one to mark my place in a book. It’s a beautiful process art activity that (thankfully!) turns into a beautiful product.
Which is the very best kids’ art project of all.
Looking for more art projects to do with your kids? Head here next-